Composer 101: Basic Markdown to Keynote Flow
In this Tutorial, we're going to take a look at the basics of writing a presentation in Markdown, and how Composer uses that to generate a fully-custom Build Script for Keynote.
Composer uses a plain-text semantic mark-up format known as Markdown for its primary control surface. Markdown uses a few simple "shorthand" conventions for describing the hierarchal structure of a document and its formatting, as shown below, and is extremely easy to pick up (by design).
Once you've got a handle on the Markdown basics, we'll have a look at using a dedicated Markdown editor, generating a Build Script from your Markdown source, and running your builds with Mac's Script Editor app.
Markdown Basics

You don't need anything special to write Markdown: it's just plain text. Start with a hash mark and a space to make a Title. A single hash mark indicates a Title or Divider slide.

Hit Return, and then add a blank line: then add a Subtitle, and three dashes to indicate the end of the slide. This is all Composer needs to understand that you want to build a "Title" slide.
To script out a show, just focus on your message. Write each slide following the same pattern, using the basic elements of a slide layout.

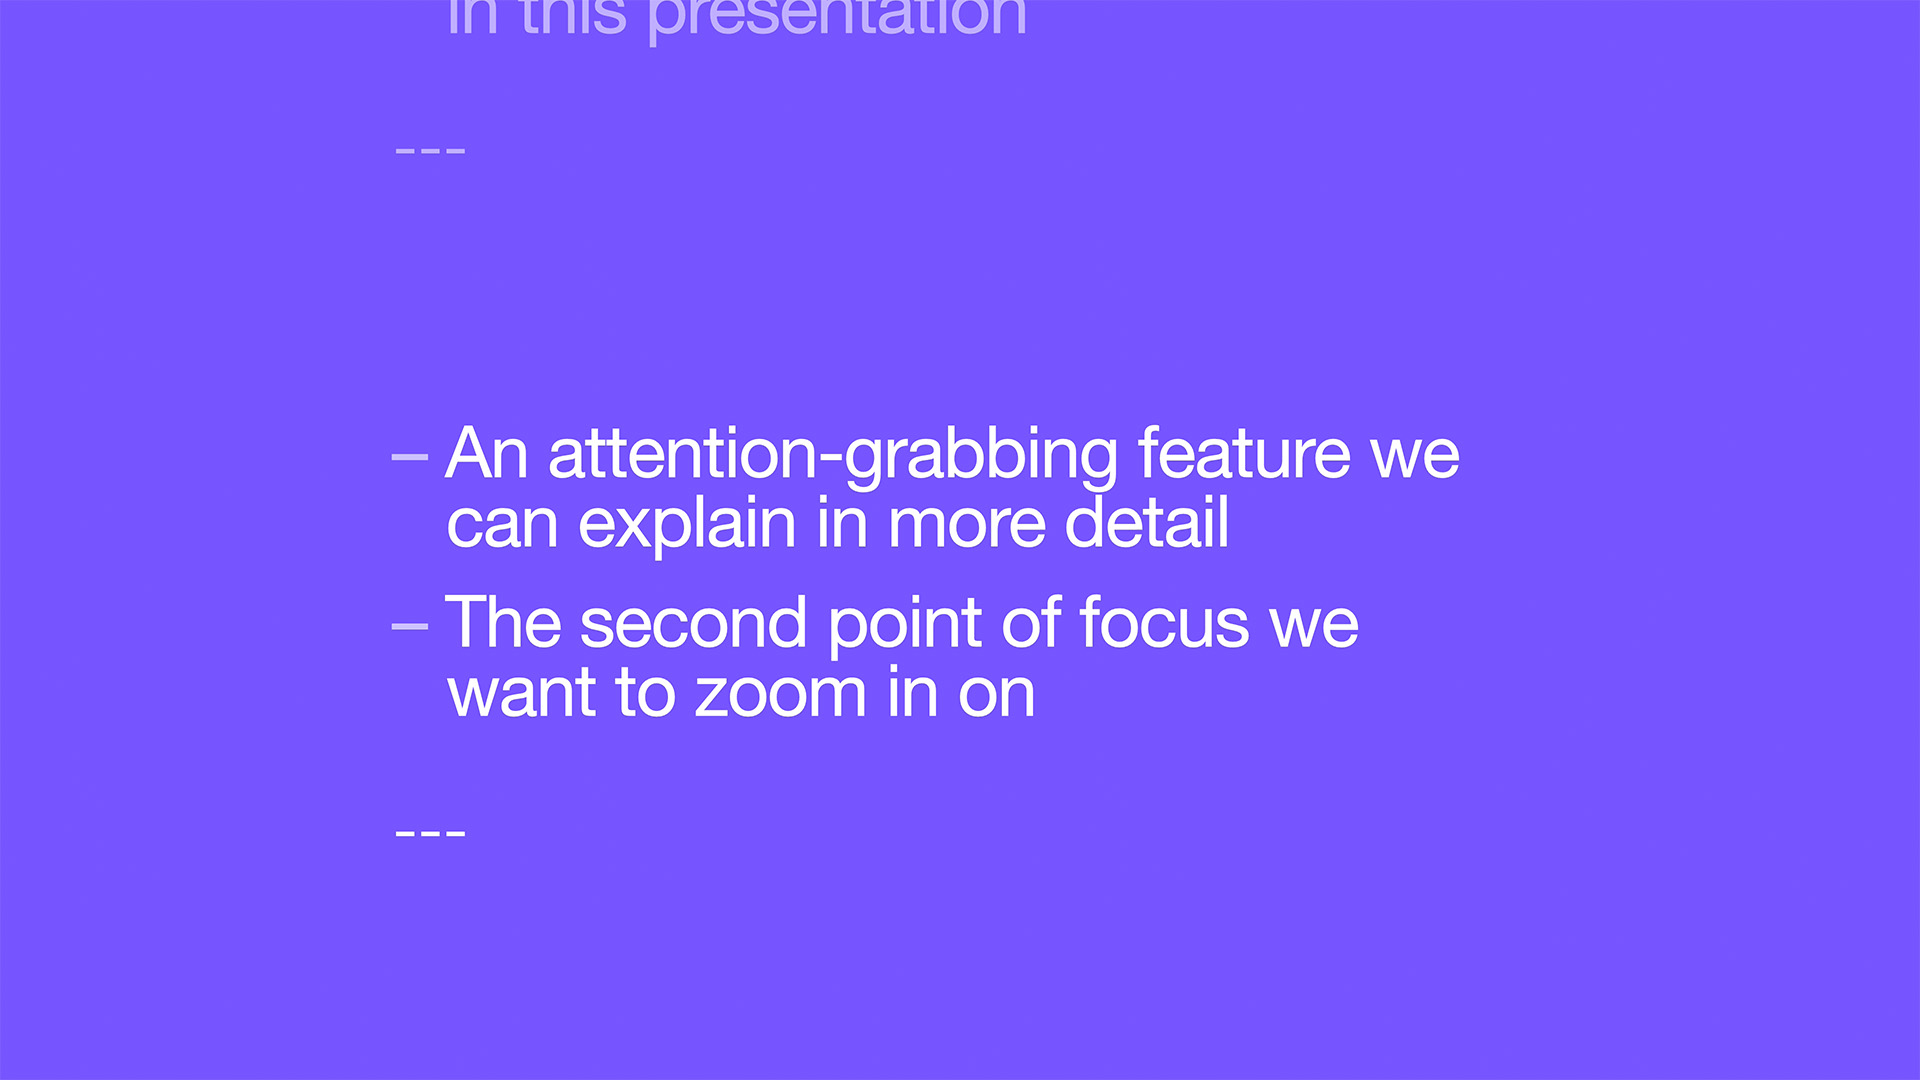
Use two hash marks on a Title to indicate a common Content layout, like "Title and Bullets." To add Bullets, just add a dash and a space to the beginning of each paragraph. When you're done, end the slide with three dashes - just like before.
Composer maps out the basic elements used on each slide against Keynote's default layouts to determine which layout to use. So if we remove the Title from a "Title & Bullets" slide, we're building a basic "Bullets" slide.
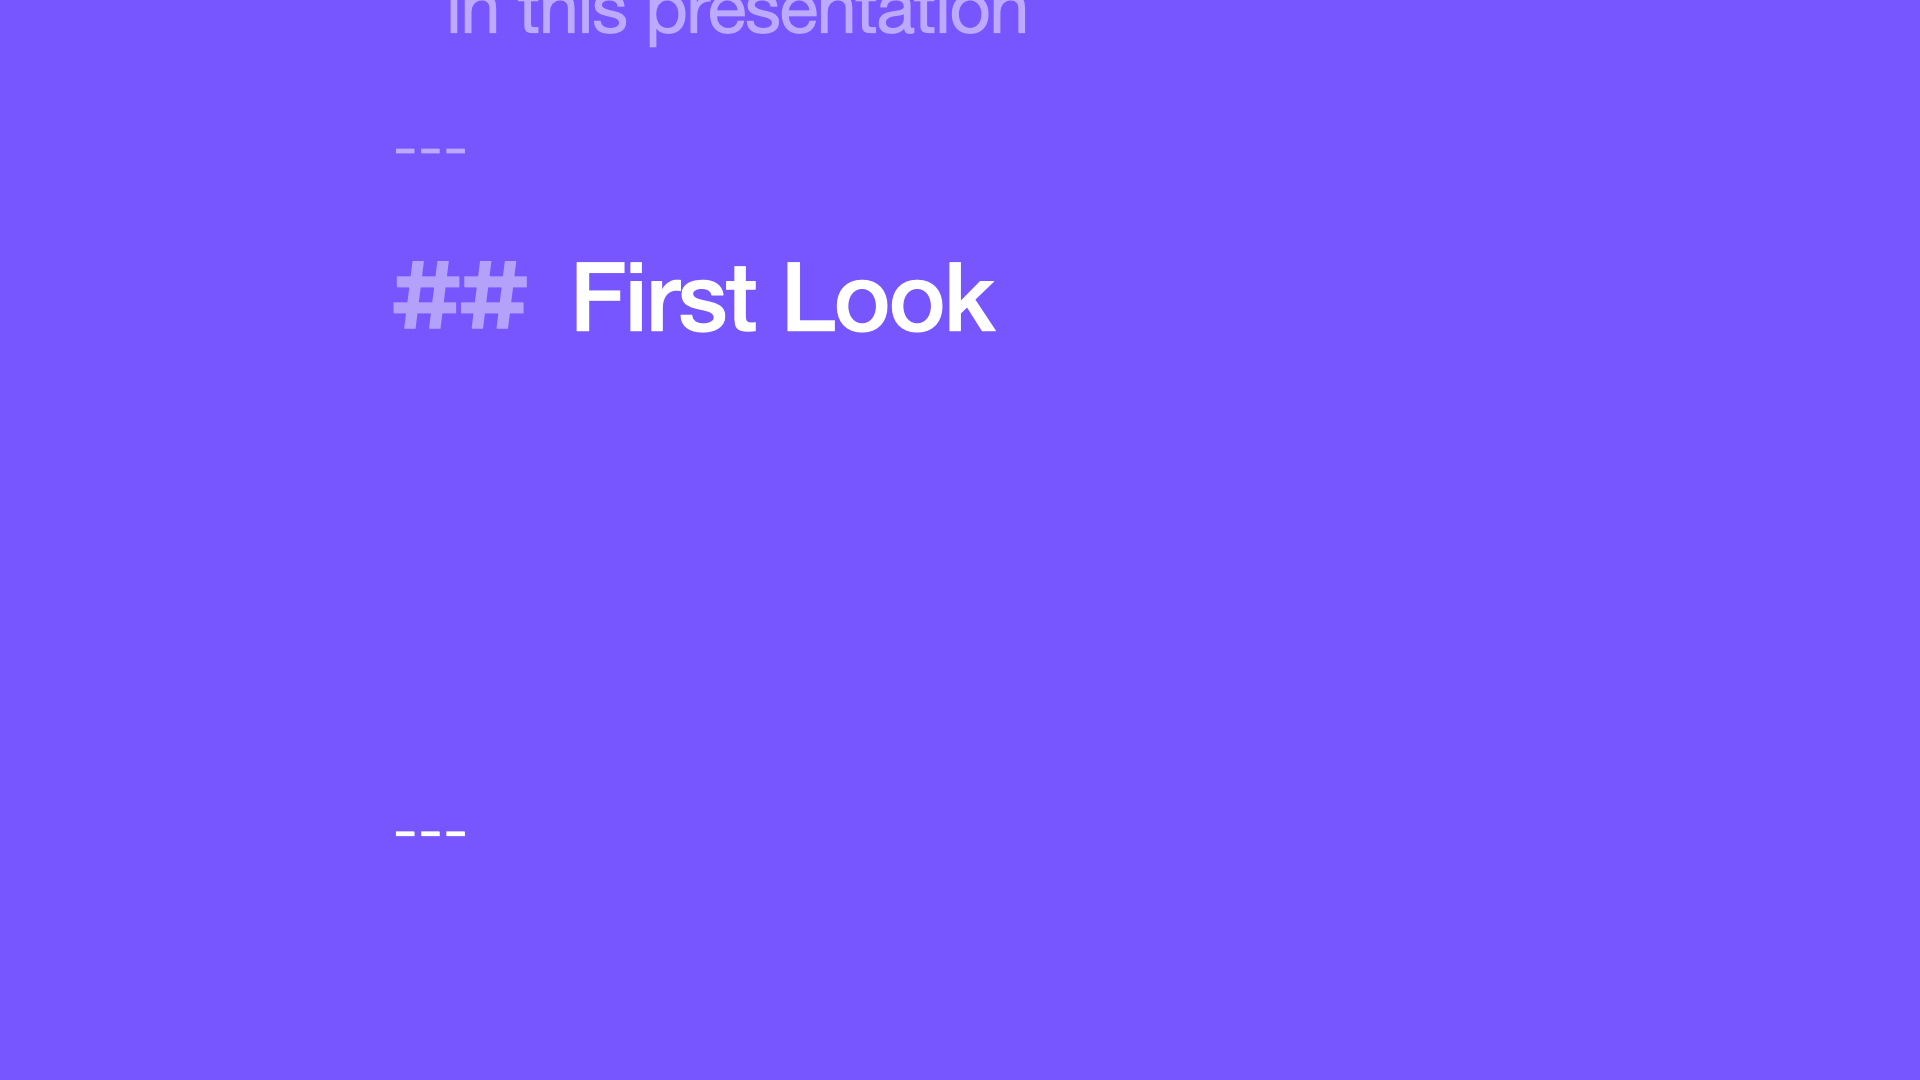
If we flip that around, and include an H2 Content Title by itself - we'll build a "Title Only" slide.

And remember: you can change that to an H1 Title to make it a "Section" divider.

When you're ready to add an image to your show, you can do it a few different ways. Local images – images that are located on your computer – are indicated with an Exclamation Point and two square brackets. Add the file name from Finder, and close the brackets. If we close the slide here, we're building a basic "Photo" layout.

If you want to add a Remote image – directly from the web – use a slightly different syntax: use an exclamation point and a single set of brackets, then a parenthesis to hold the web address.

Or – if you want to add an image to a layout, but you aren't sure which one you want to use yet – you can use a local-style image wrapper around a Placeholder Image tag to include the theme's default image: that'll ensure a placeholder's ready and waiting for you once you get to Keynote.
Simple combinations of Titles, Bullets, or Images will build most of Keynote's default layouts. But there are a few additional elements we can use to get more specialized:
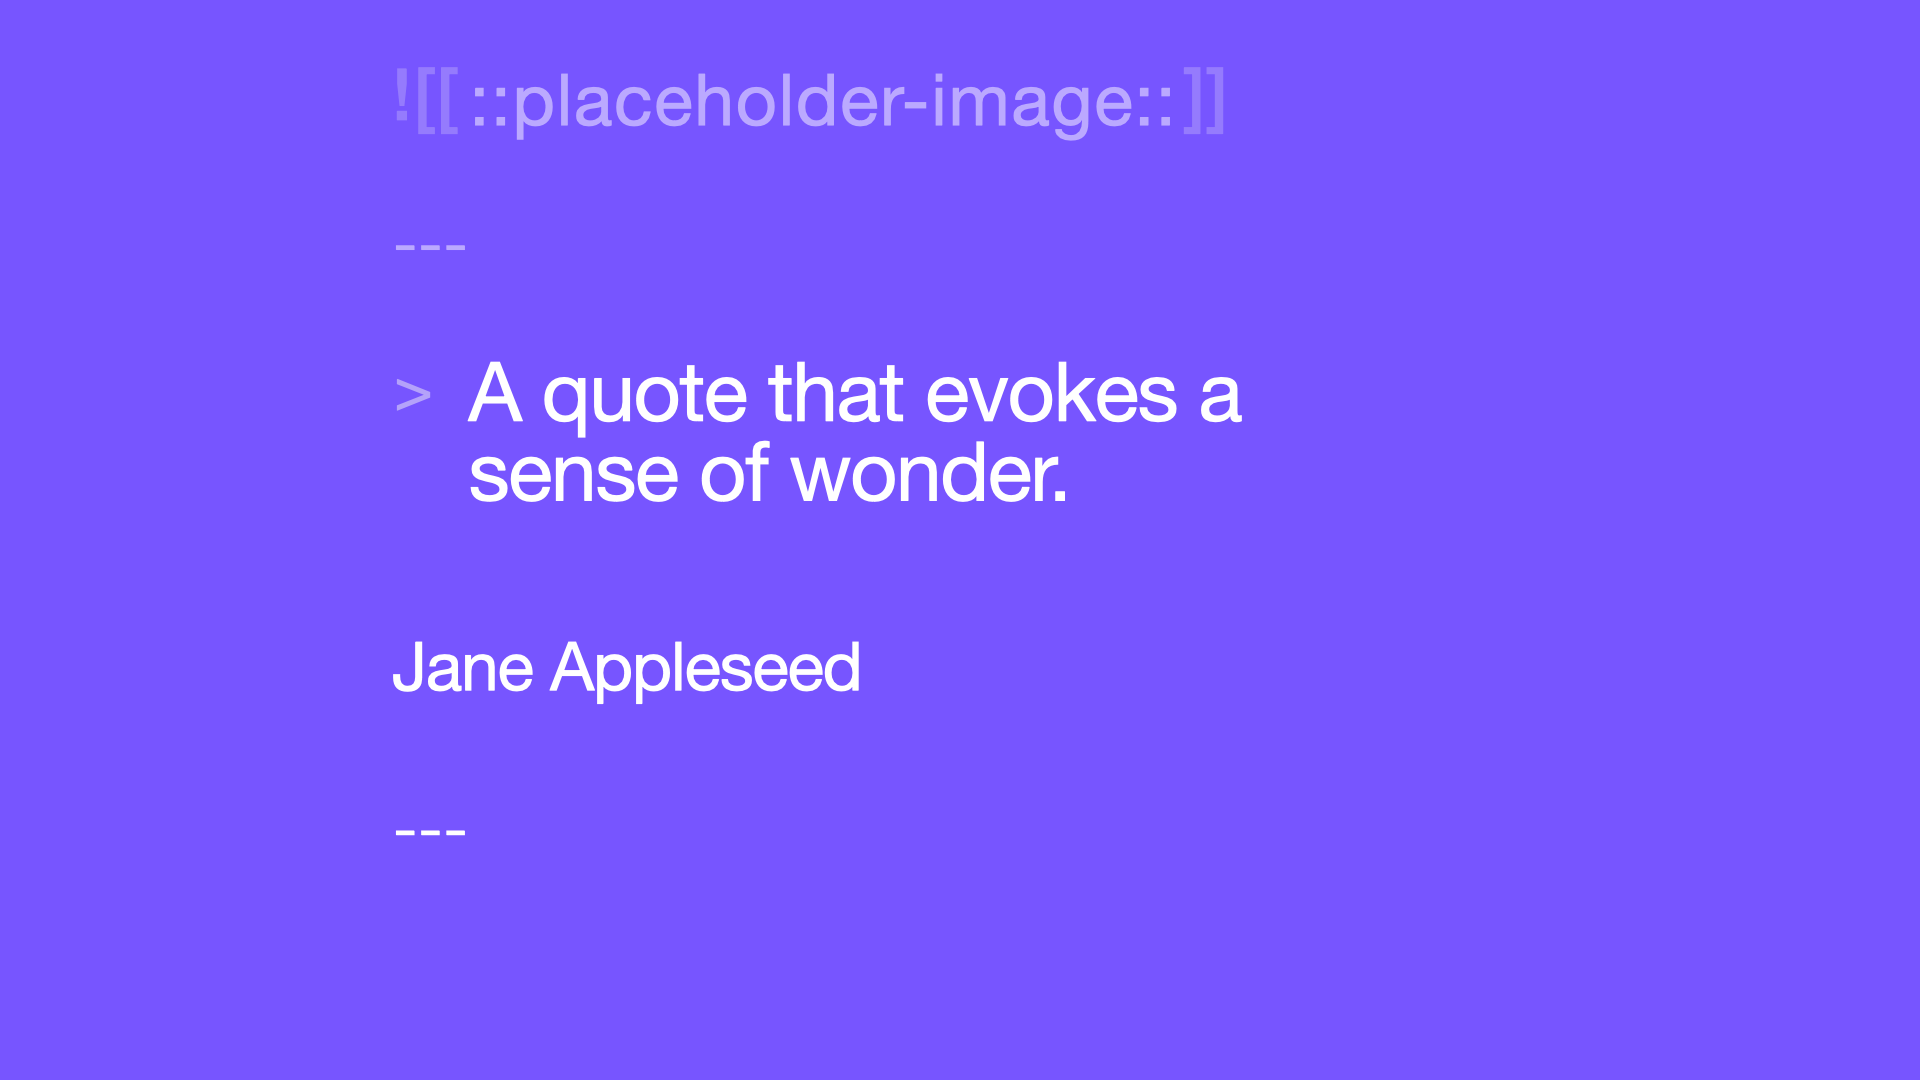
To build a "Quote" slide, type a Right Angle Bracket and a space before your quotation, then follow with a plain Paragraph element containing the attribution.
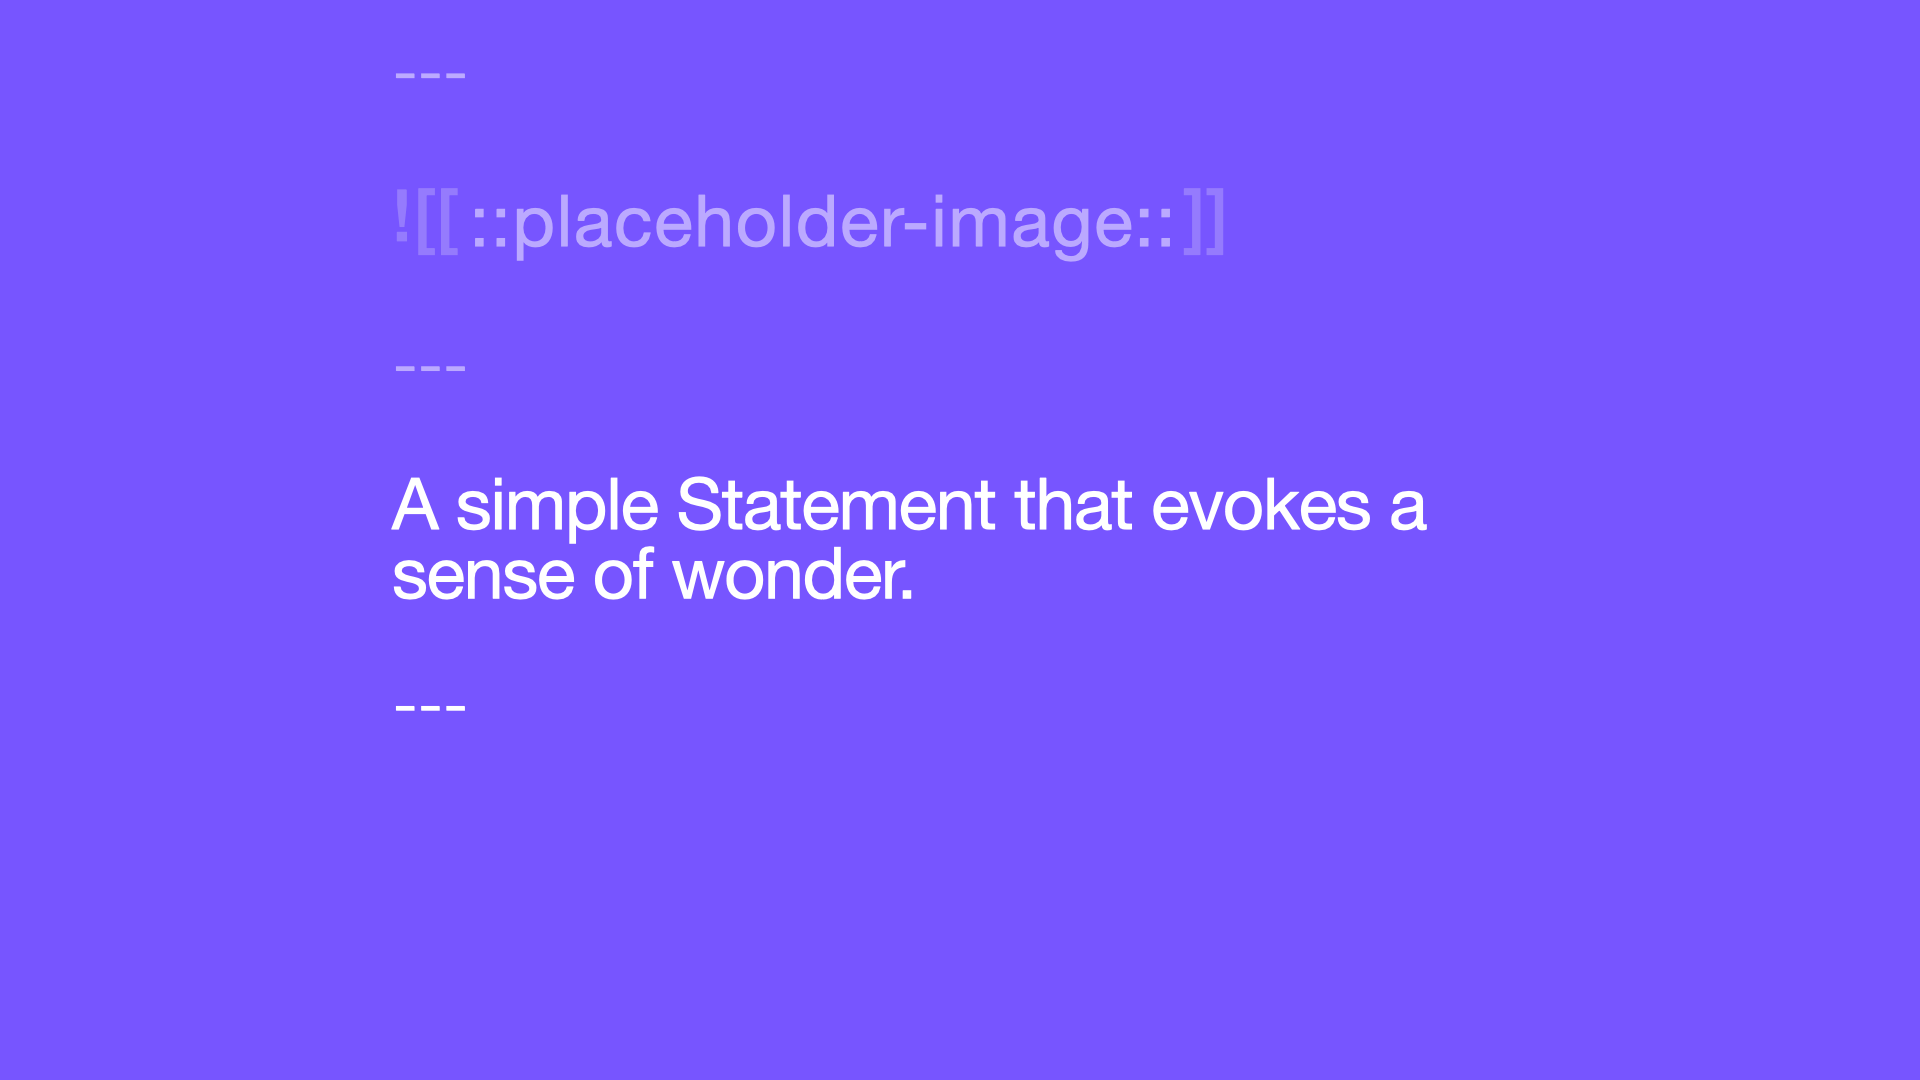
Or, if you just want to make a simple "Statement" slide, use a basic paragraph all by itself.
That's really all there is to it. It's a straightforward pattern, using a few basic symbols, that allows you to stay completely focused on what you want to say. And if you plan out or draft your shows this way, it allows you to start working with Keynote in new, and completely different ways.
Editor Integration
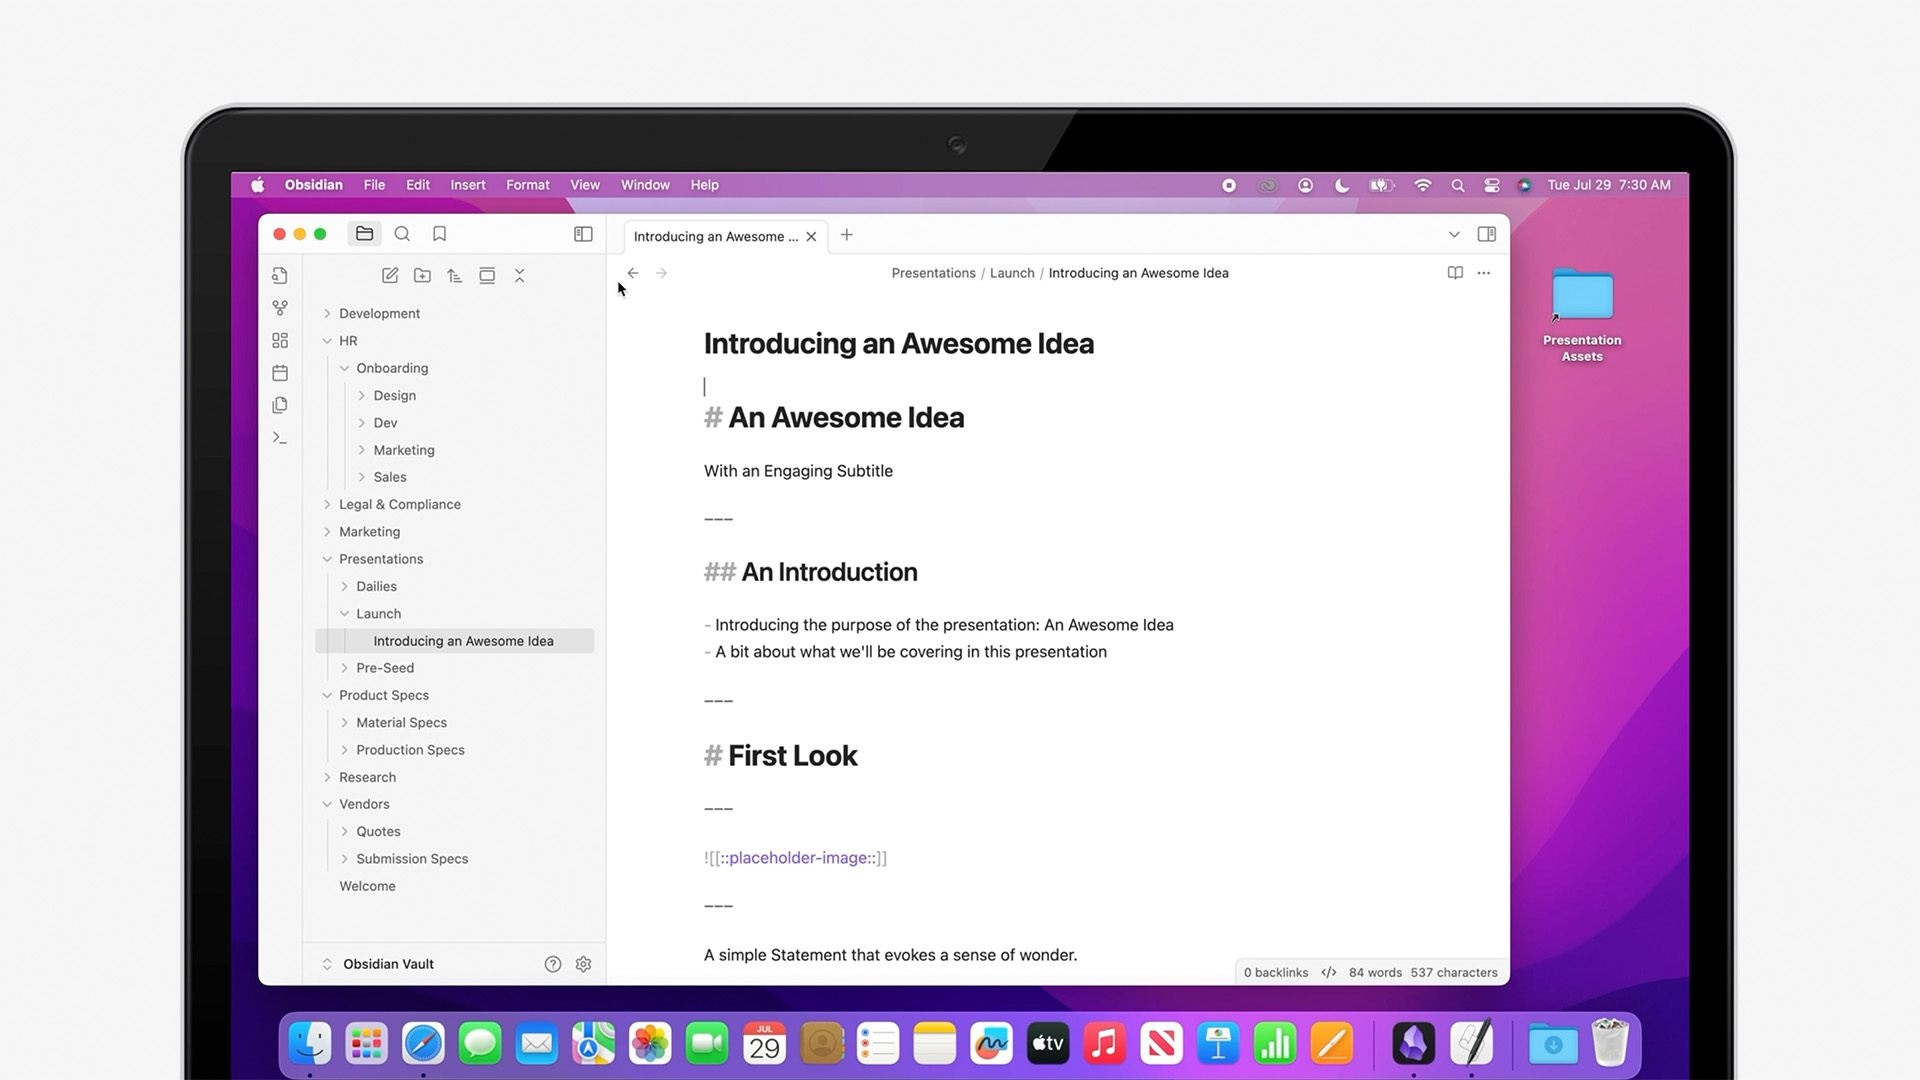
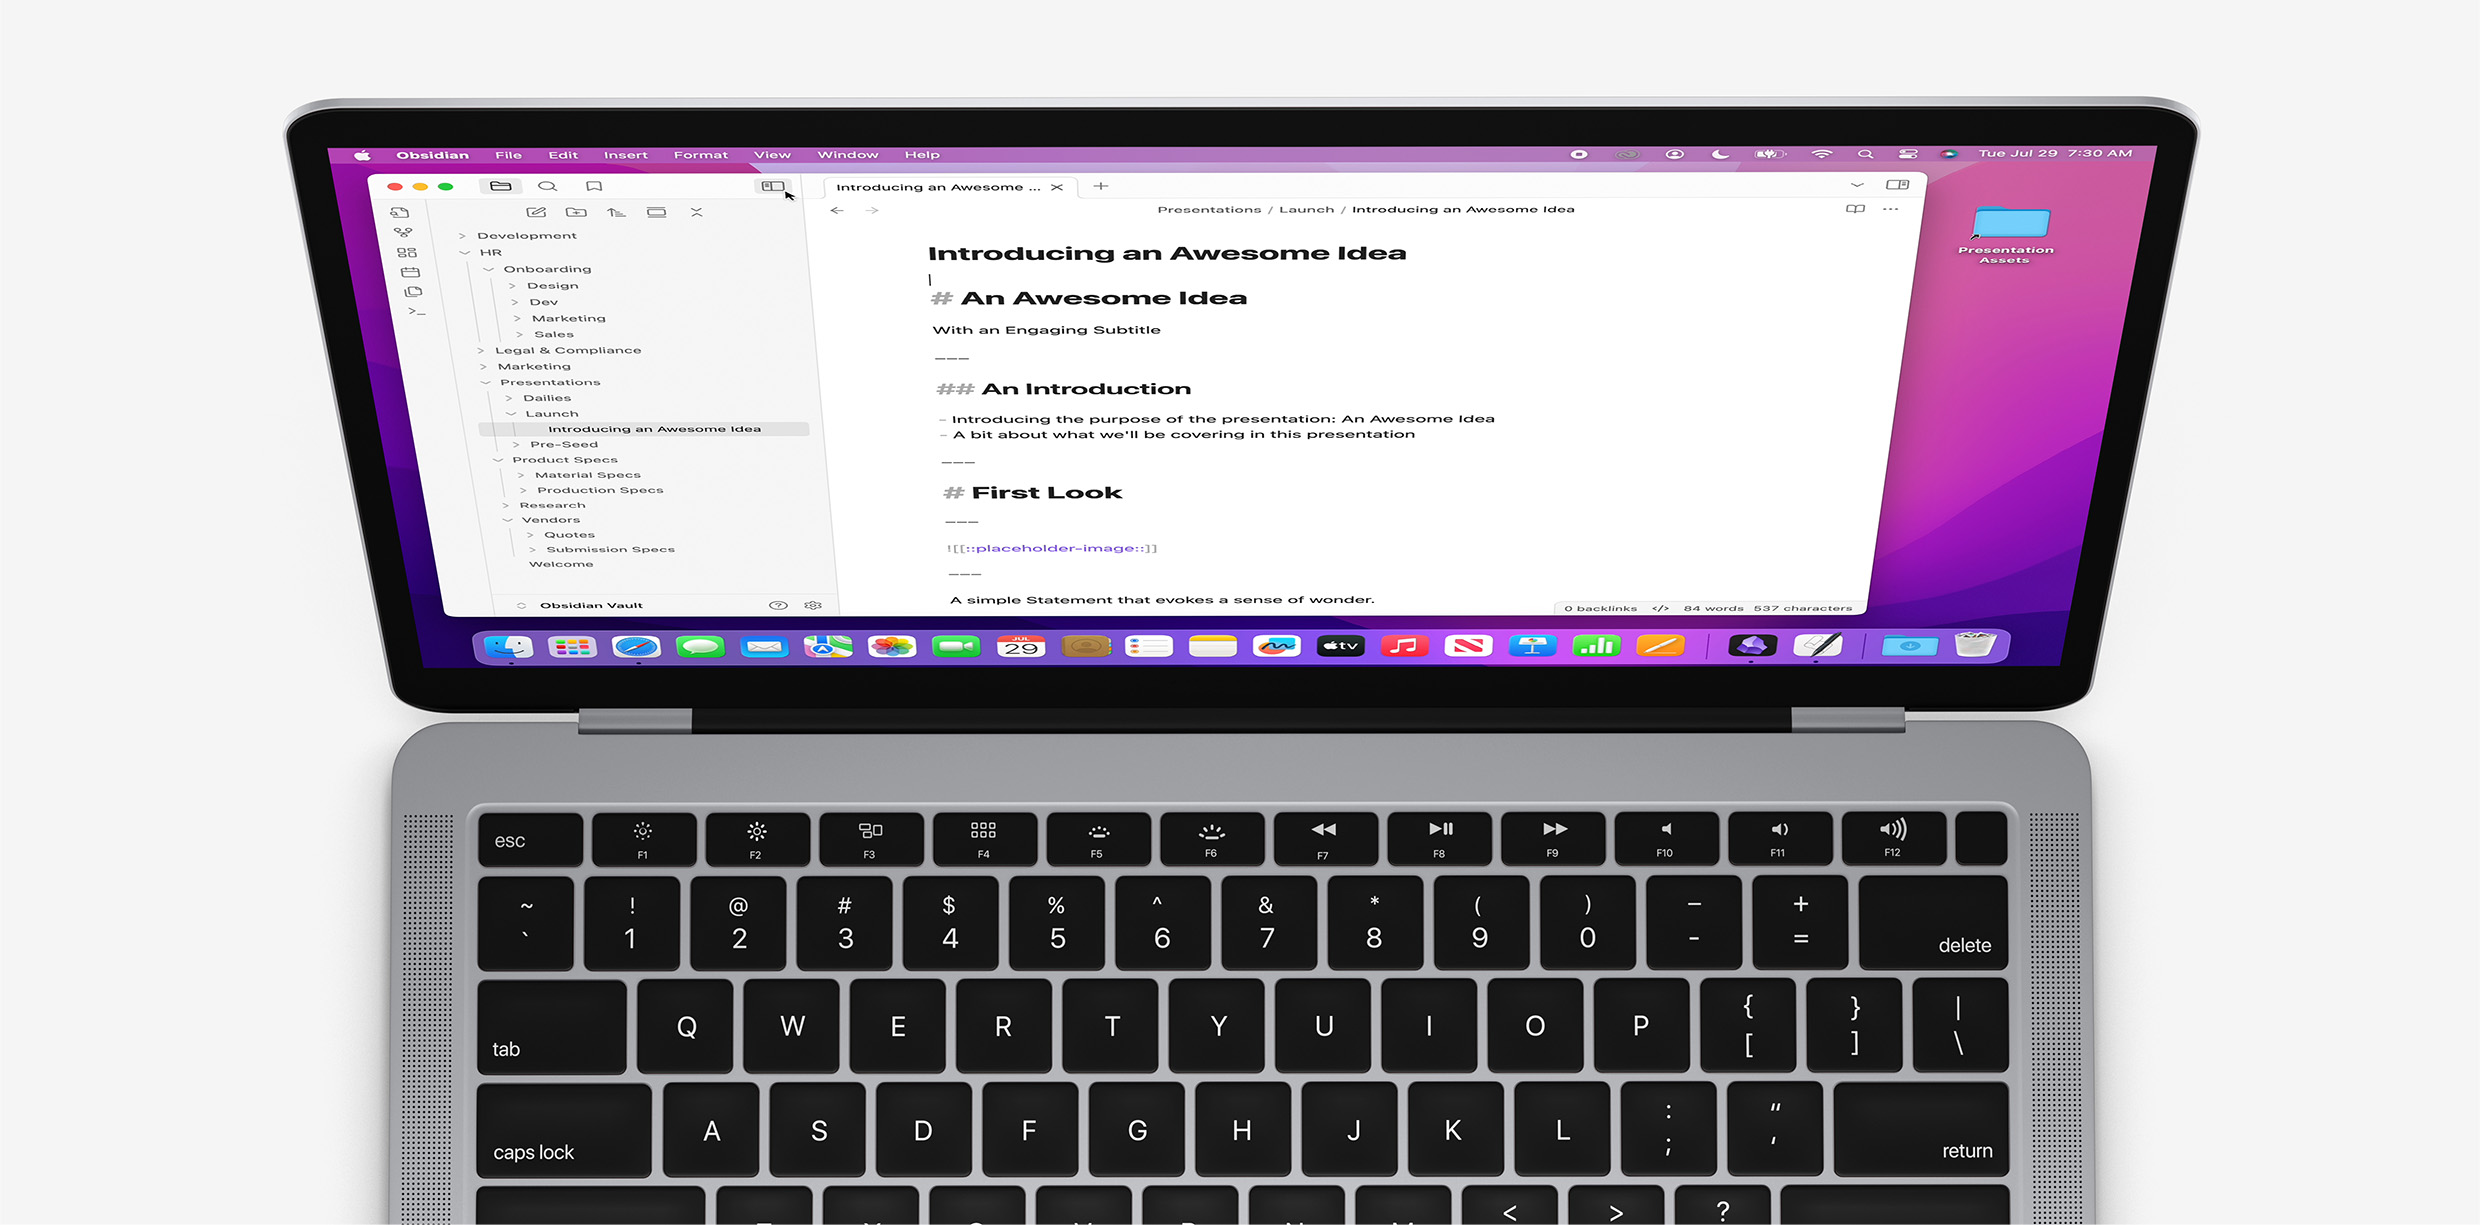
On your Mac, apps like Ulysses and Obsidian are specially-made for writing this way, and make it easy to edit and organize your presentations right alongside all your other notes.
In Obsidian, you can toggle between "Reading View" and "Source Mode" to see the Markdown source for any of your documents: type "Command-E" - or click the View Icon - to toggle between reading and edit modes. Be sure "Source Mode" is enabled in the View Menu to view the plain Markdown source.
And since it's made for Markdown, you can let the app handle the formatting basics for you when you drag in image assets from your Obsidian Vault: this makes image integration a breeze.
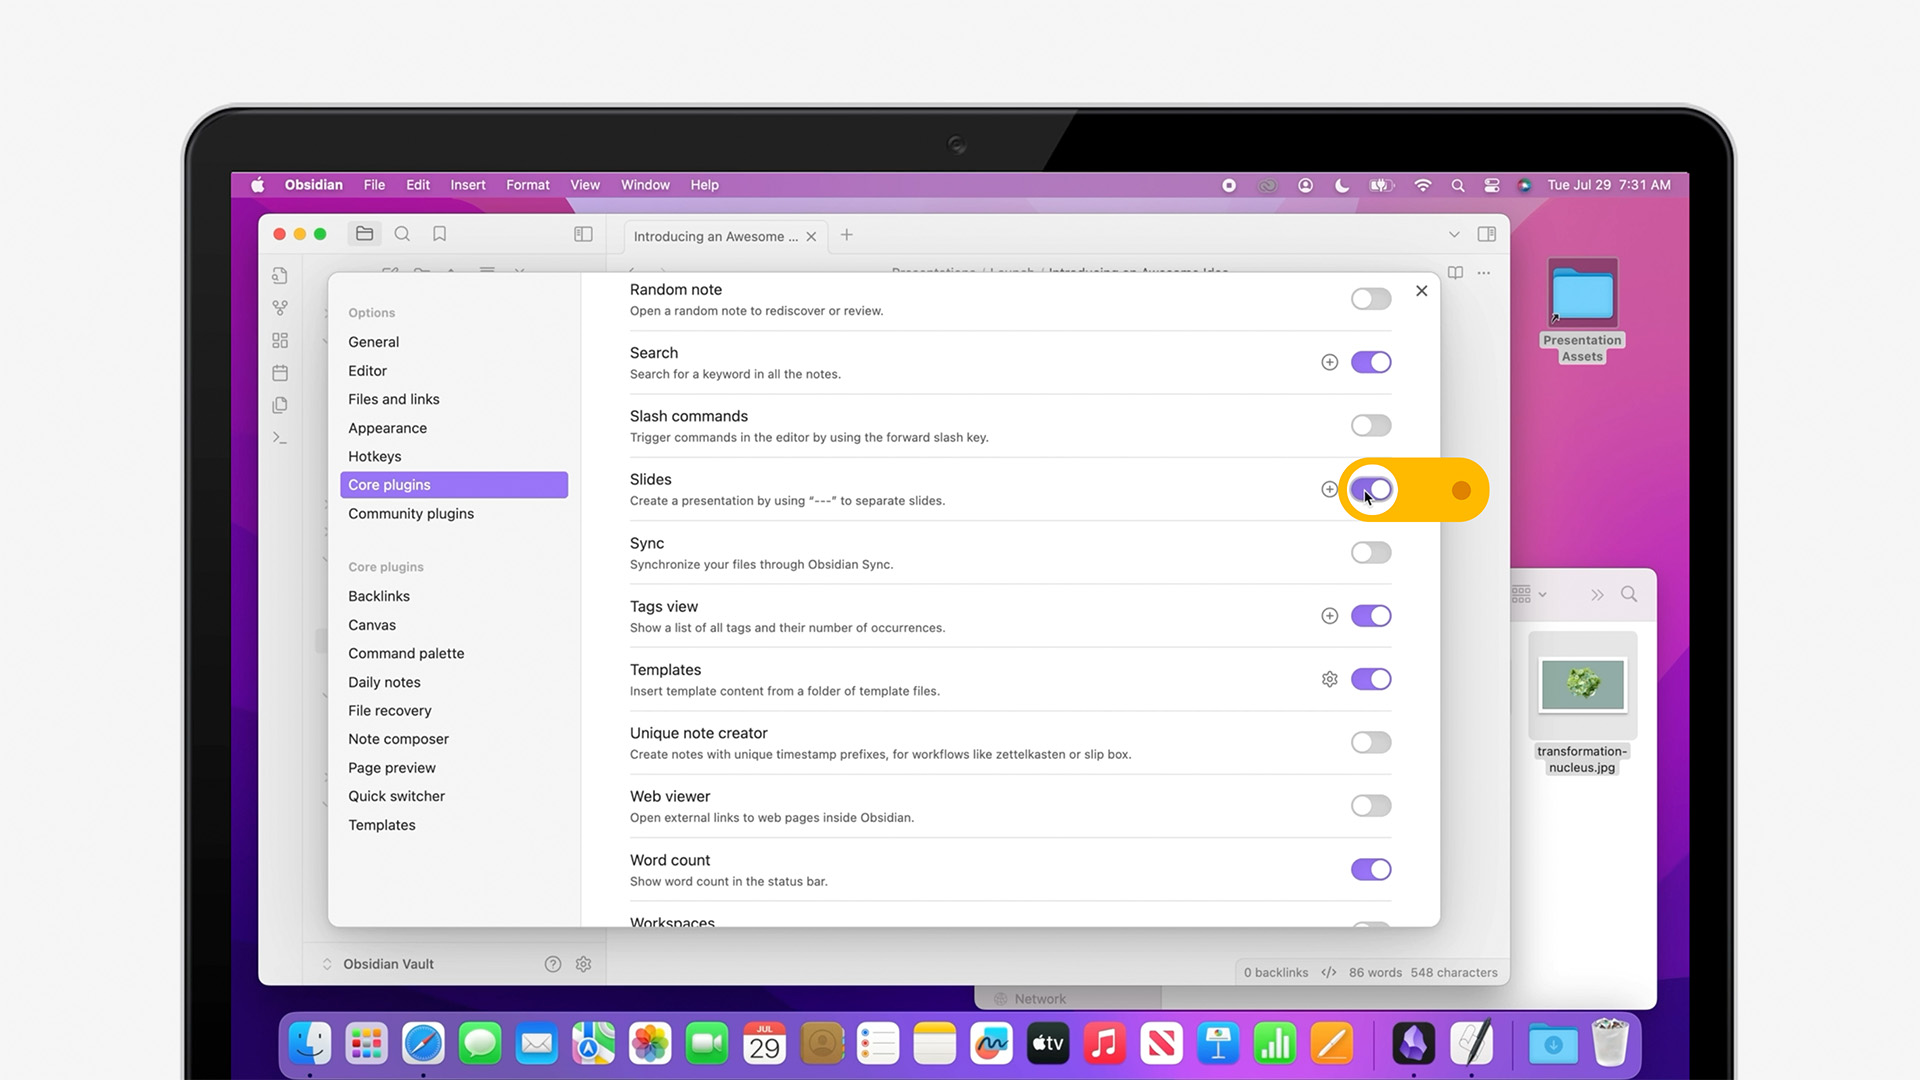
Obsidian even includes a rudimentary Presentation Mode, so you can get a rough idea of how each slide is shaping up as you go. To enable the Slides plugin, open the Settings from the App's menu, and select "Core Plugins": scroll down to "Slides" and toggle it to active.
Once enabled, you can Right-click or Command-click a presentation document and select "Start Presentation" to switch modes. Hit Escape - or click the mode-level Exit Button - to close Presentation Mode and return to editing.
Build & First Run
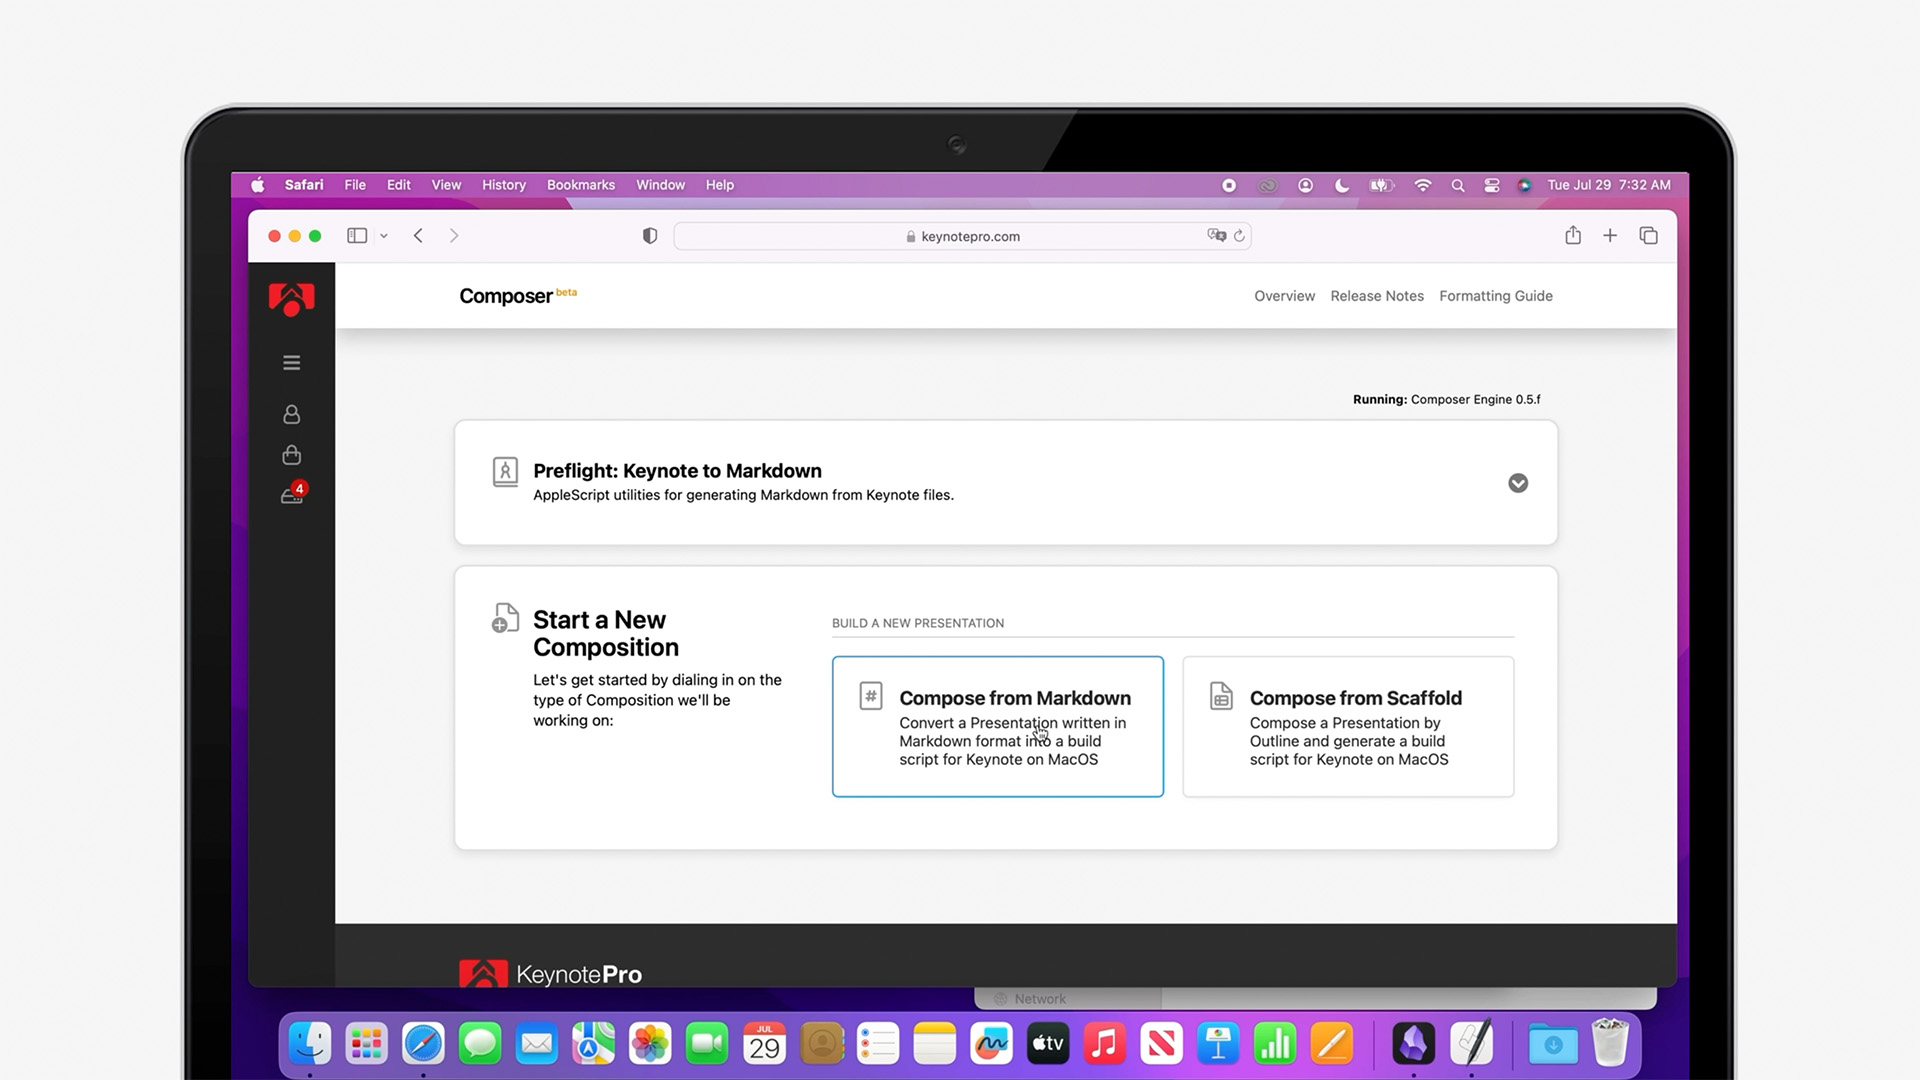
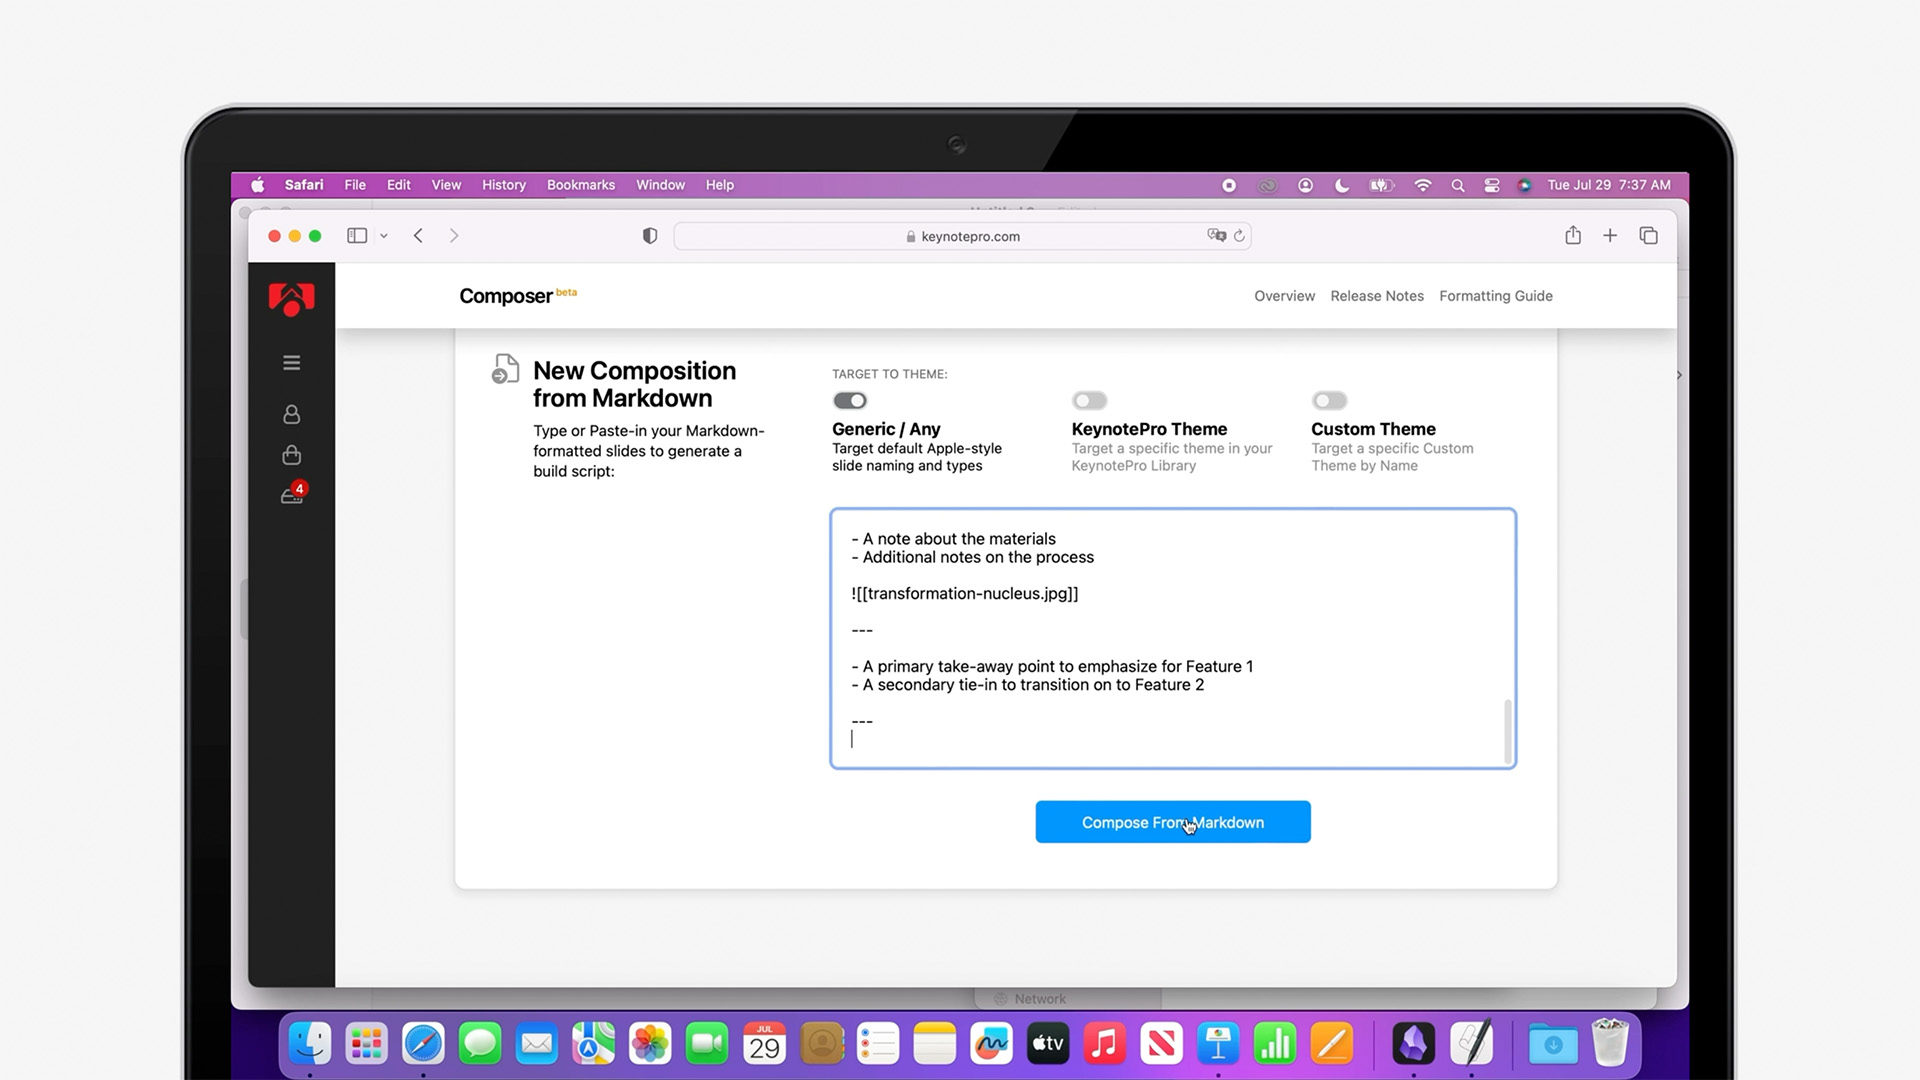
Whenever you're ready to transition to Keynote, select the Markdown source for your show and Copy it to your clipboard. In your browser, bring up Composer and select the Compose from Markdown pathway.

Paste your Markdown into the input field: we're going to leave the Output Targeting set to Generic for now, and choose a theme later. Click the "Compose from Markdown" button to generate a build script.
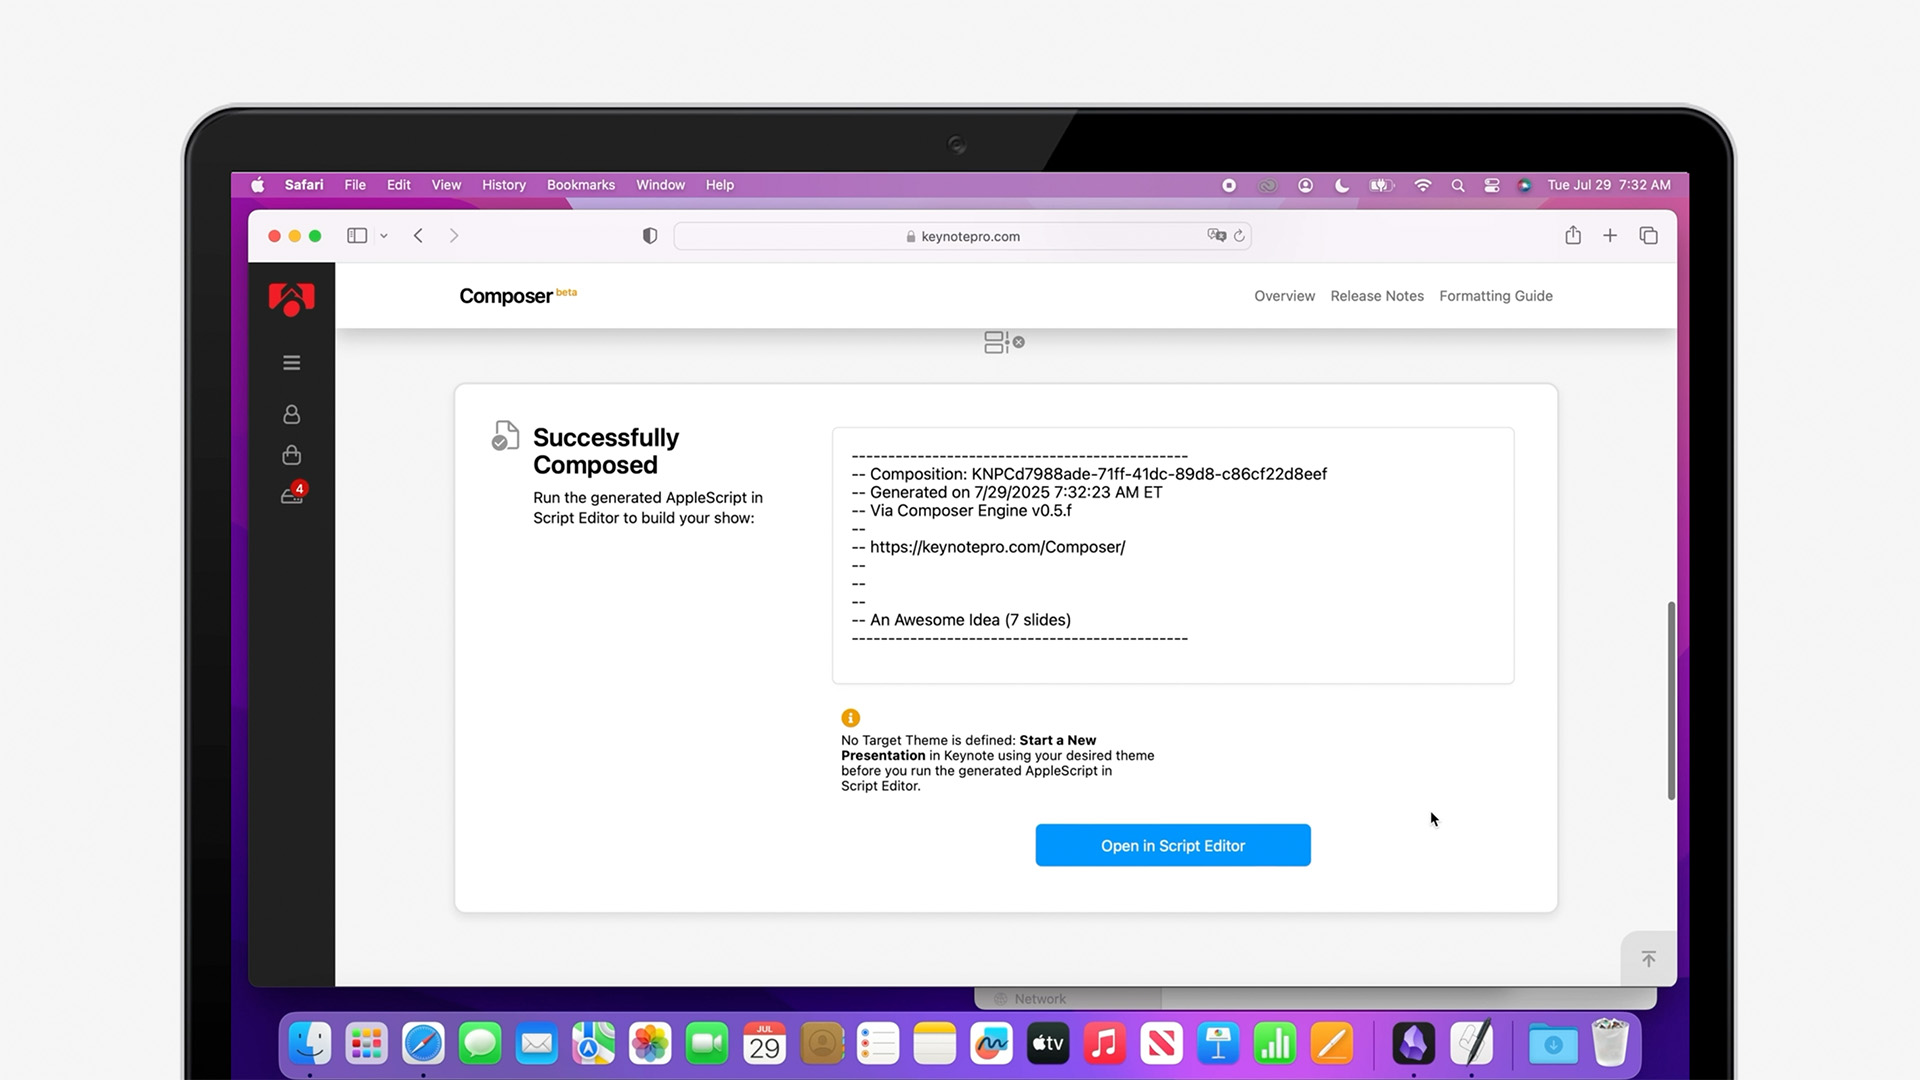
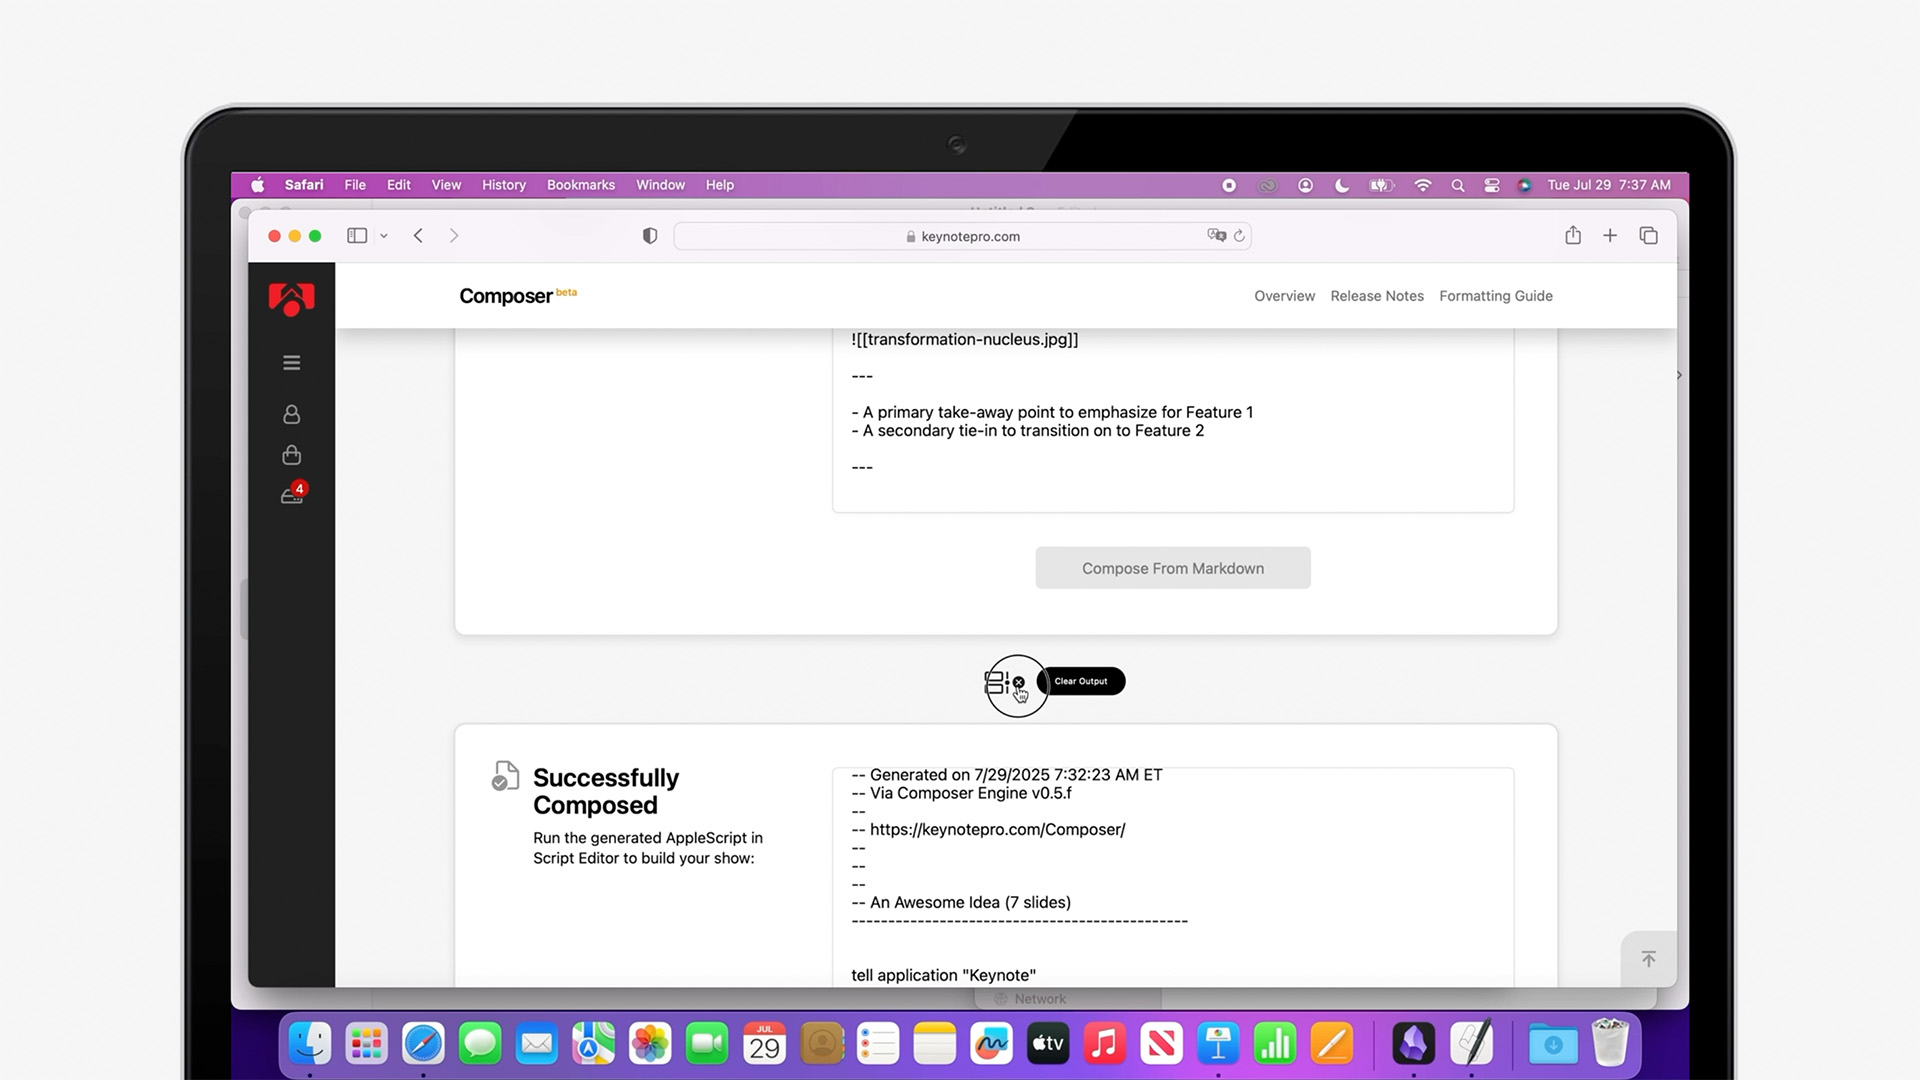
Composer parses your Markdown and – almost instantly – writes out a fully-customized AppleScript routine to build your show in Keynote, ready to run in Script Editor.
Click "Open in Script Editor," and confirm that you want the handoff to proceed: this will open the script in Mac's Script Editor application, we you can review or edit the output.

In Script Editor, Click the Compile Button to validate the script, which will make it a bit easier to read. Since we're building an entire presentation, the script includes a complete set of step-by-step build instructions for Keynote, including all of the content from your Markdown file.

Composer knows what layouts are called in every language Keynote supports – even the names that might be used in some older themes. So we can run this build using any theme that follows Keynote's standard naming conventions, no matter which language you're using.

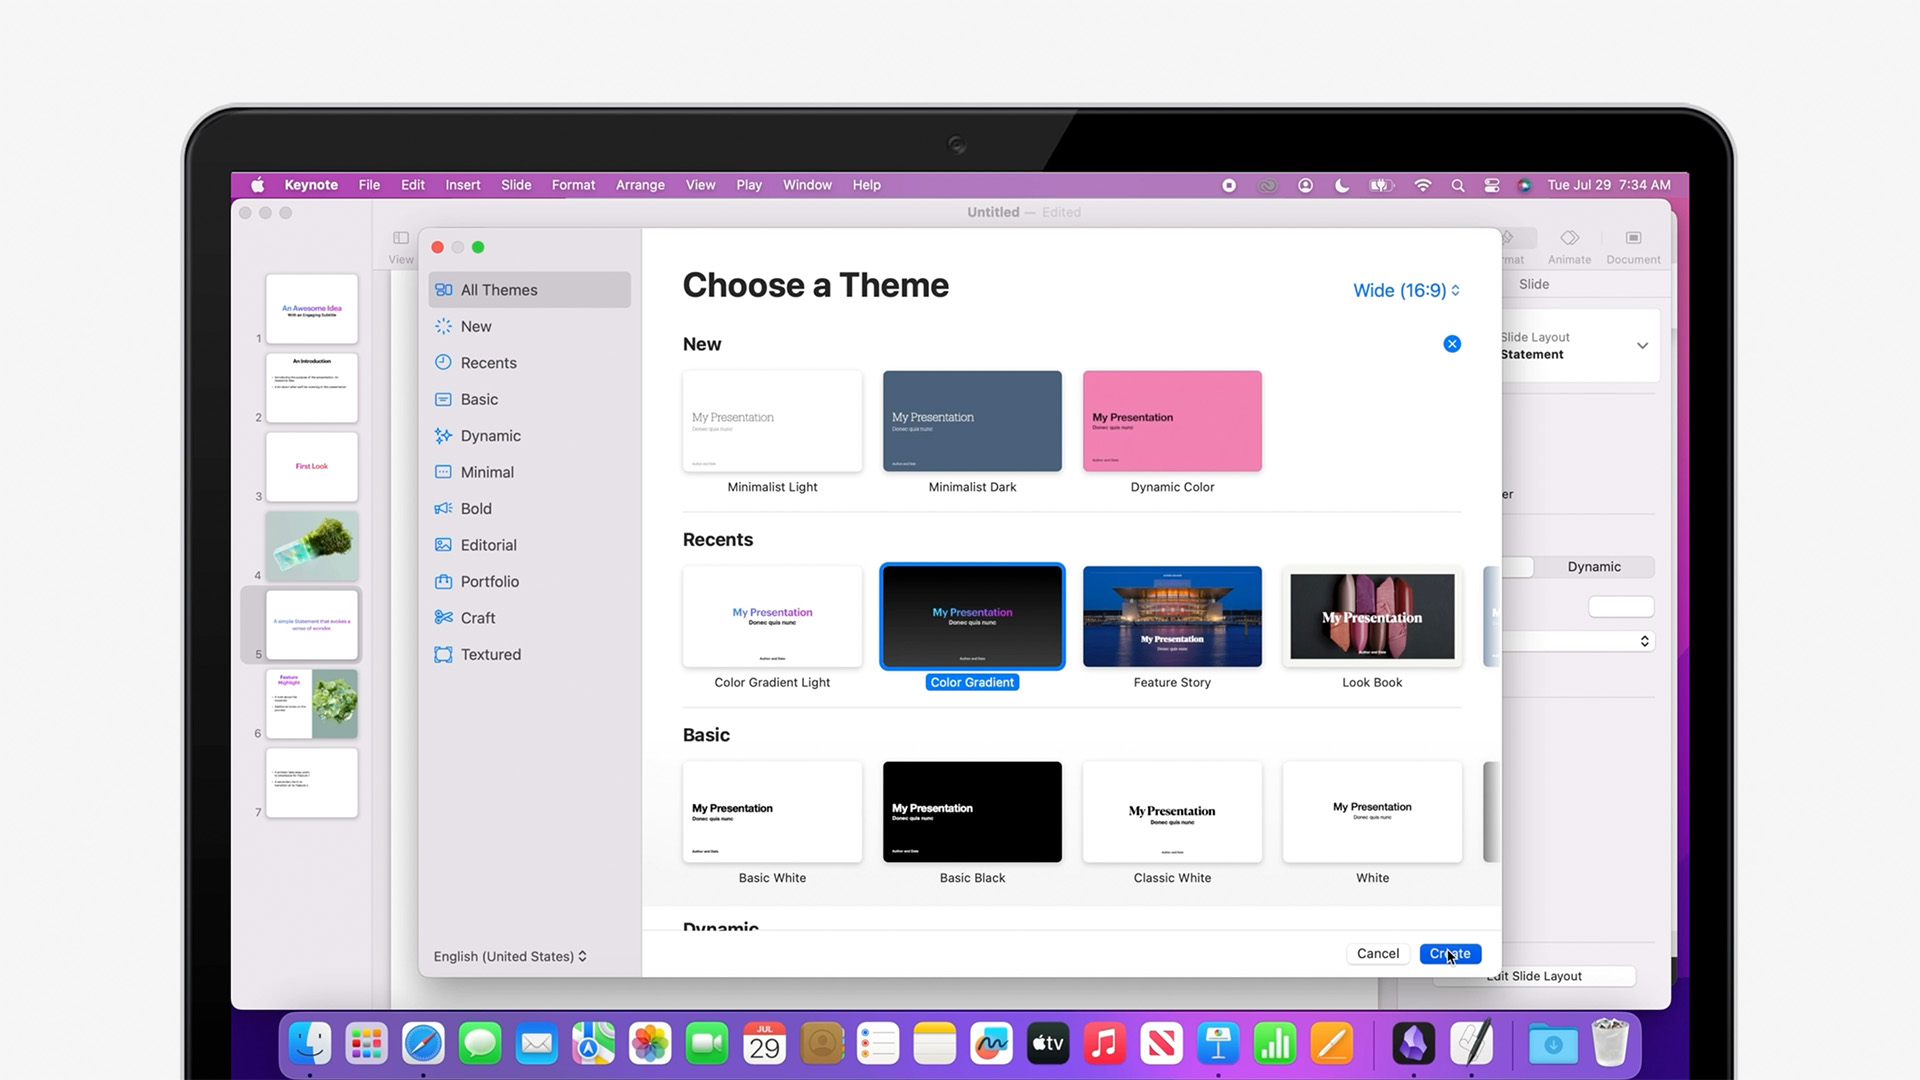
Before we click Play to run the script, we need to create a starting point in Keynote for the build. You can choose any of the built-in Themes or Custom Themes installed on your Mac, in any size you want: that's one of the advantages of separating idea from execution this way. For now, let's keep it simple and go for the Light Color Gradient theme, in Standard 4:3 format.
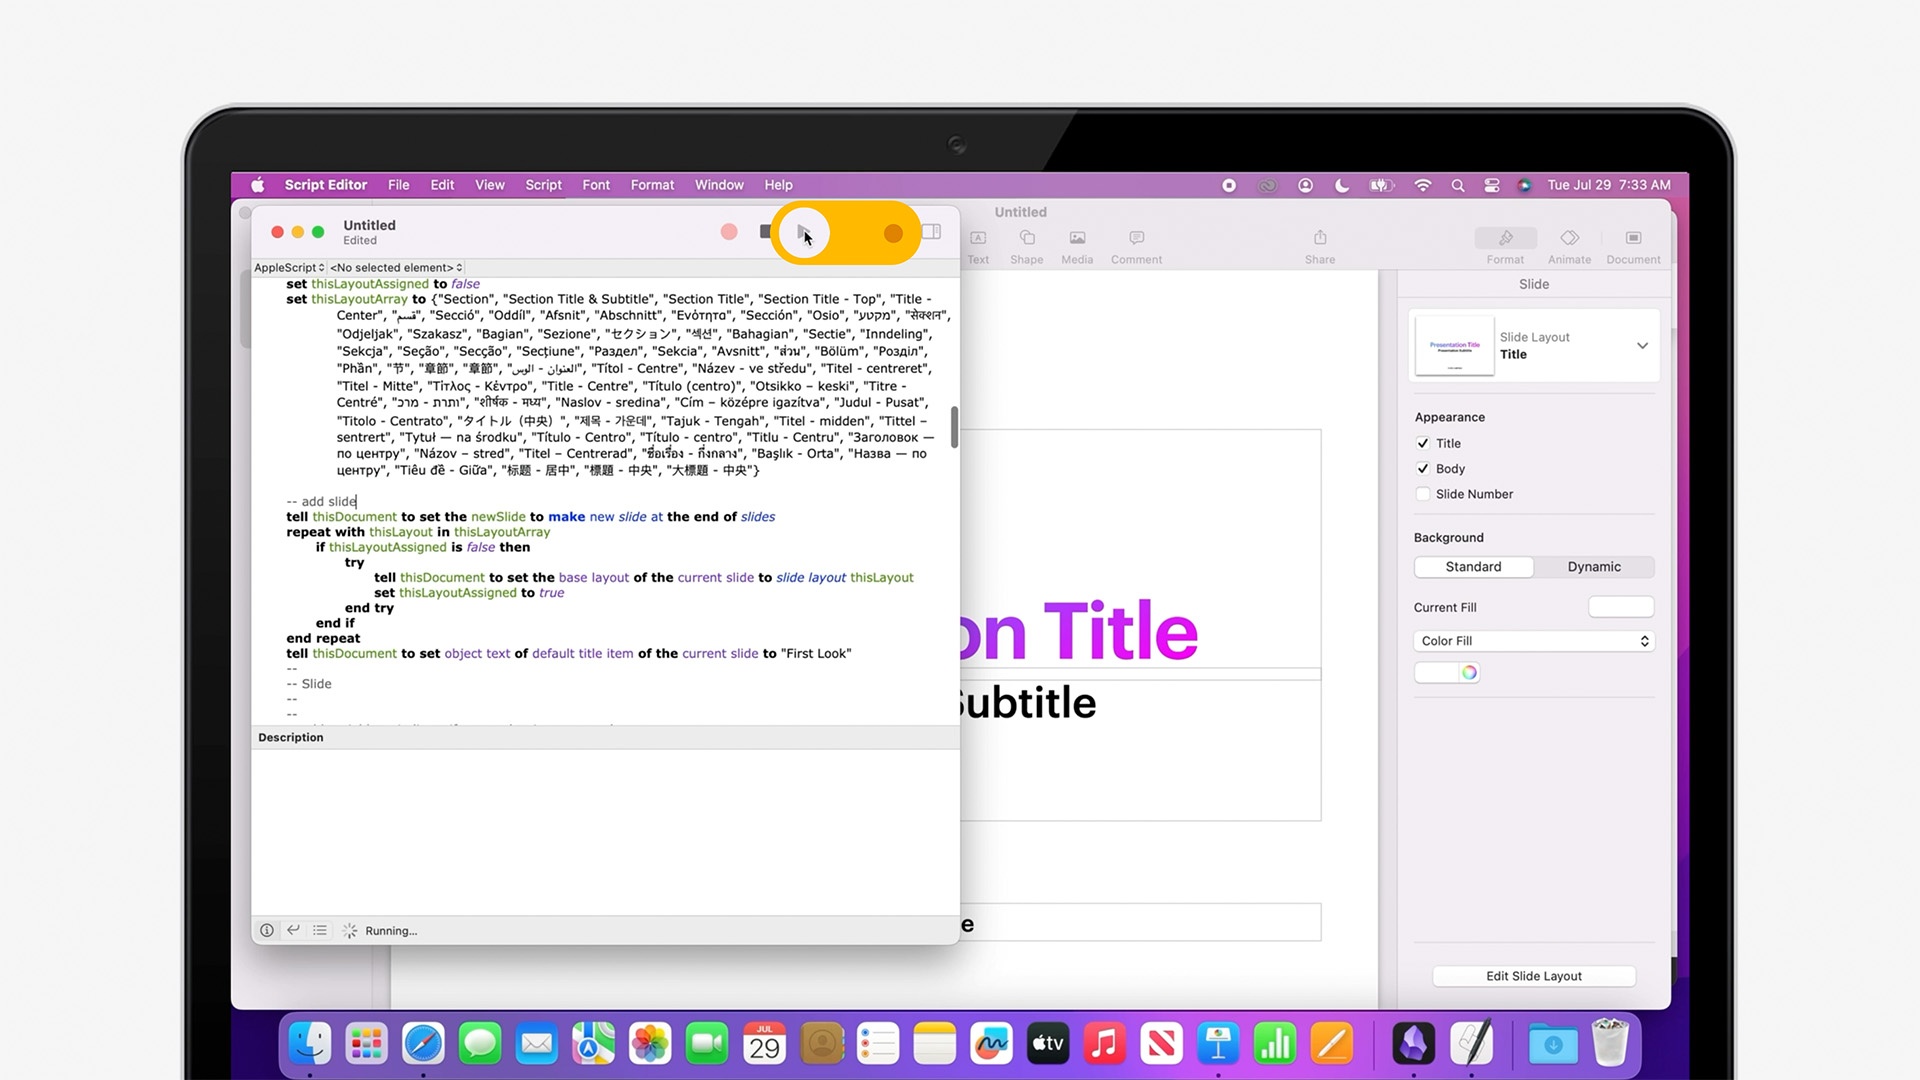
Now that we have a build target, we're ready to run the Build Script. Switch back over to Script Editor, and click the play button on your Composer Script to start the build.
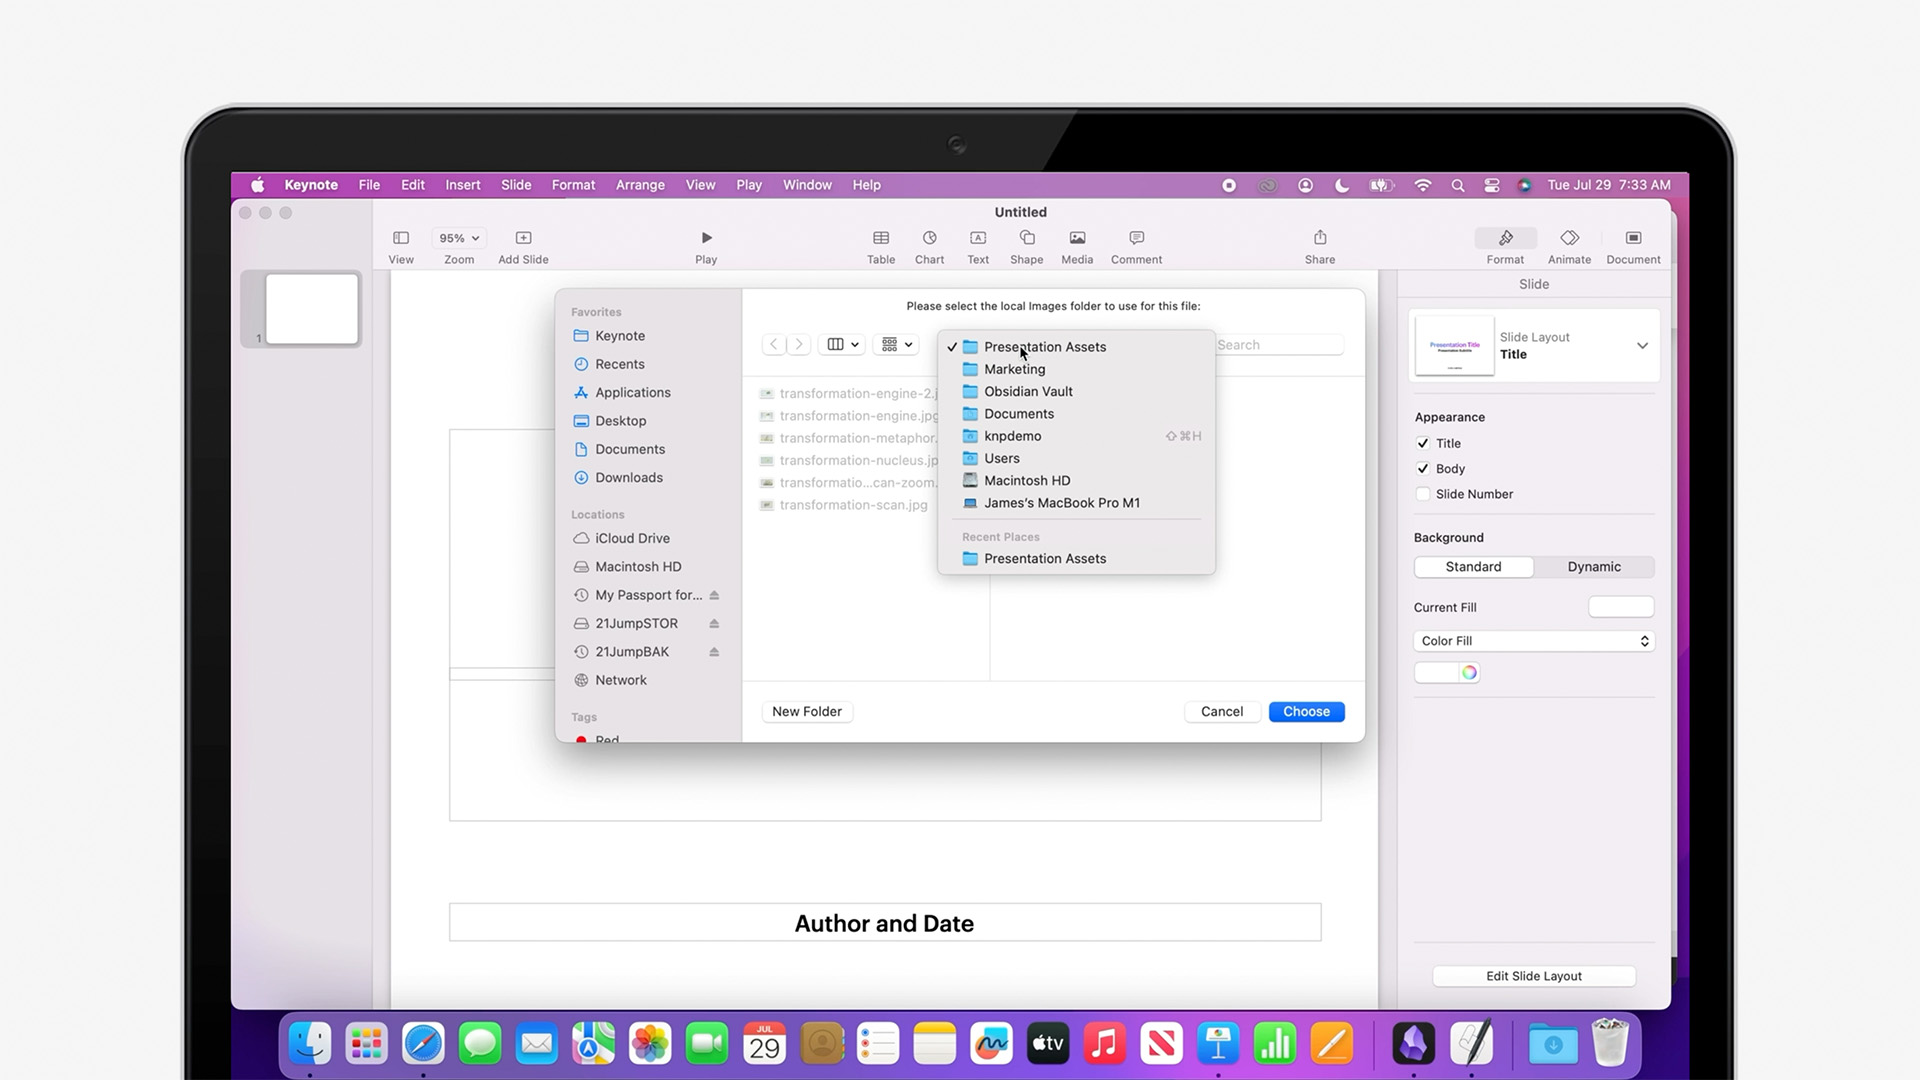
Since we're using local images, we're also prompted for the folder we should use: select the same folder we were using before in Obsidian, and click Choose.
And in just a couple of moments, you've got a complete Keynote build of your script, ready to go.
Wondering if a darker theme might be a better choice for the room? Not a problem: we can run that same Build Script against another theme – even another size – with a few short clicks:
If you're just transferring your notes and want to take it from here in Keynote, you're already good to go at this point: save your Keynote file whenever you're ready to take over, and discard the Build Script whenever you're done.
Or, we can continue making edits in Obsidian, and keep refining the original Markdown script for this show a bit more for a completely new build.
Revision & Rebuilds
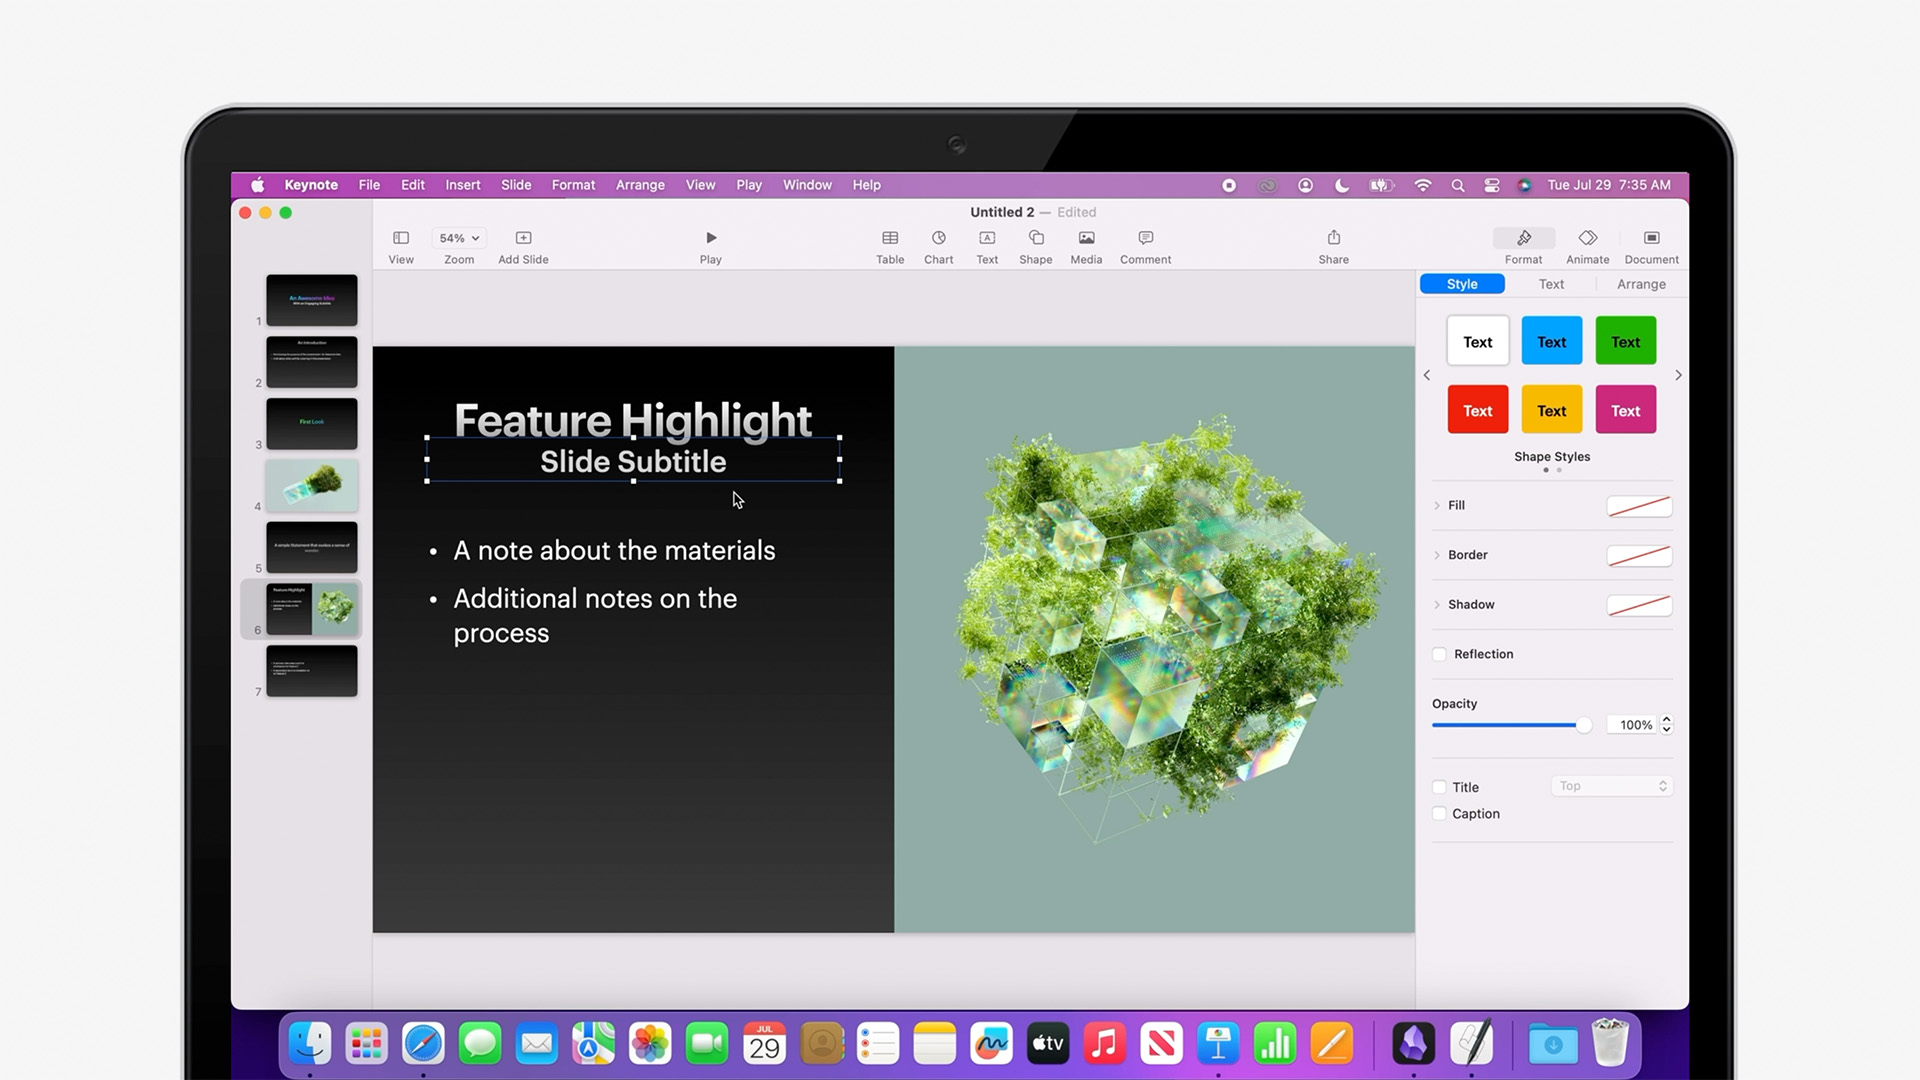
If you're targeting a theme like this one, for instance, that includes Slide-level Subtitles under the Main Title, you can add those directly into your Markdown script.
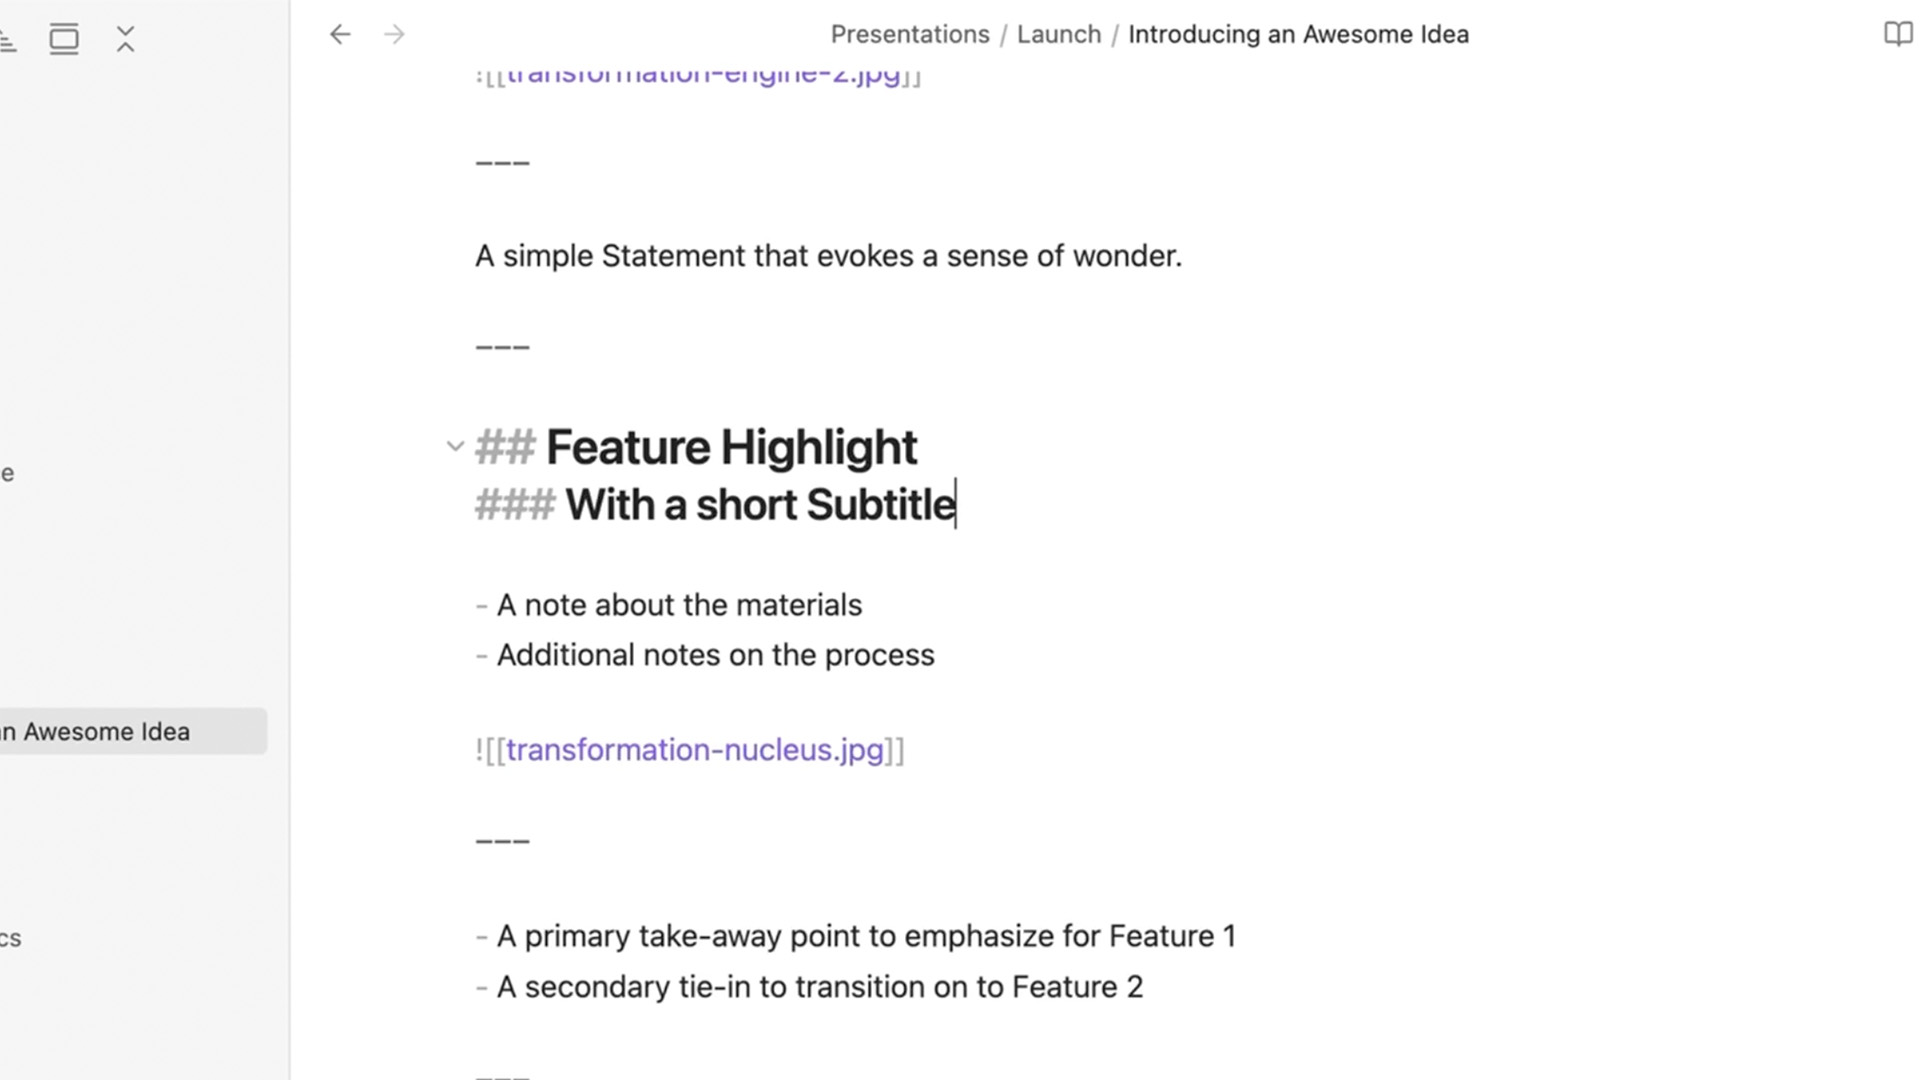
Use an H3 title – with three hash marks – directly after the slide title to target these sorts of Subtitles on your Content slides.
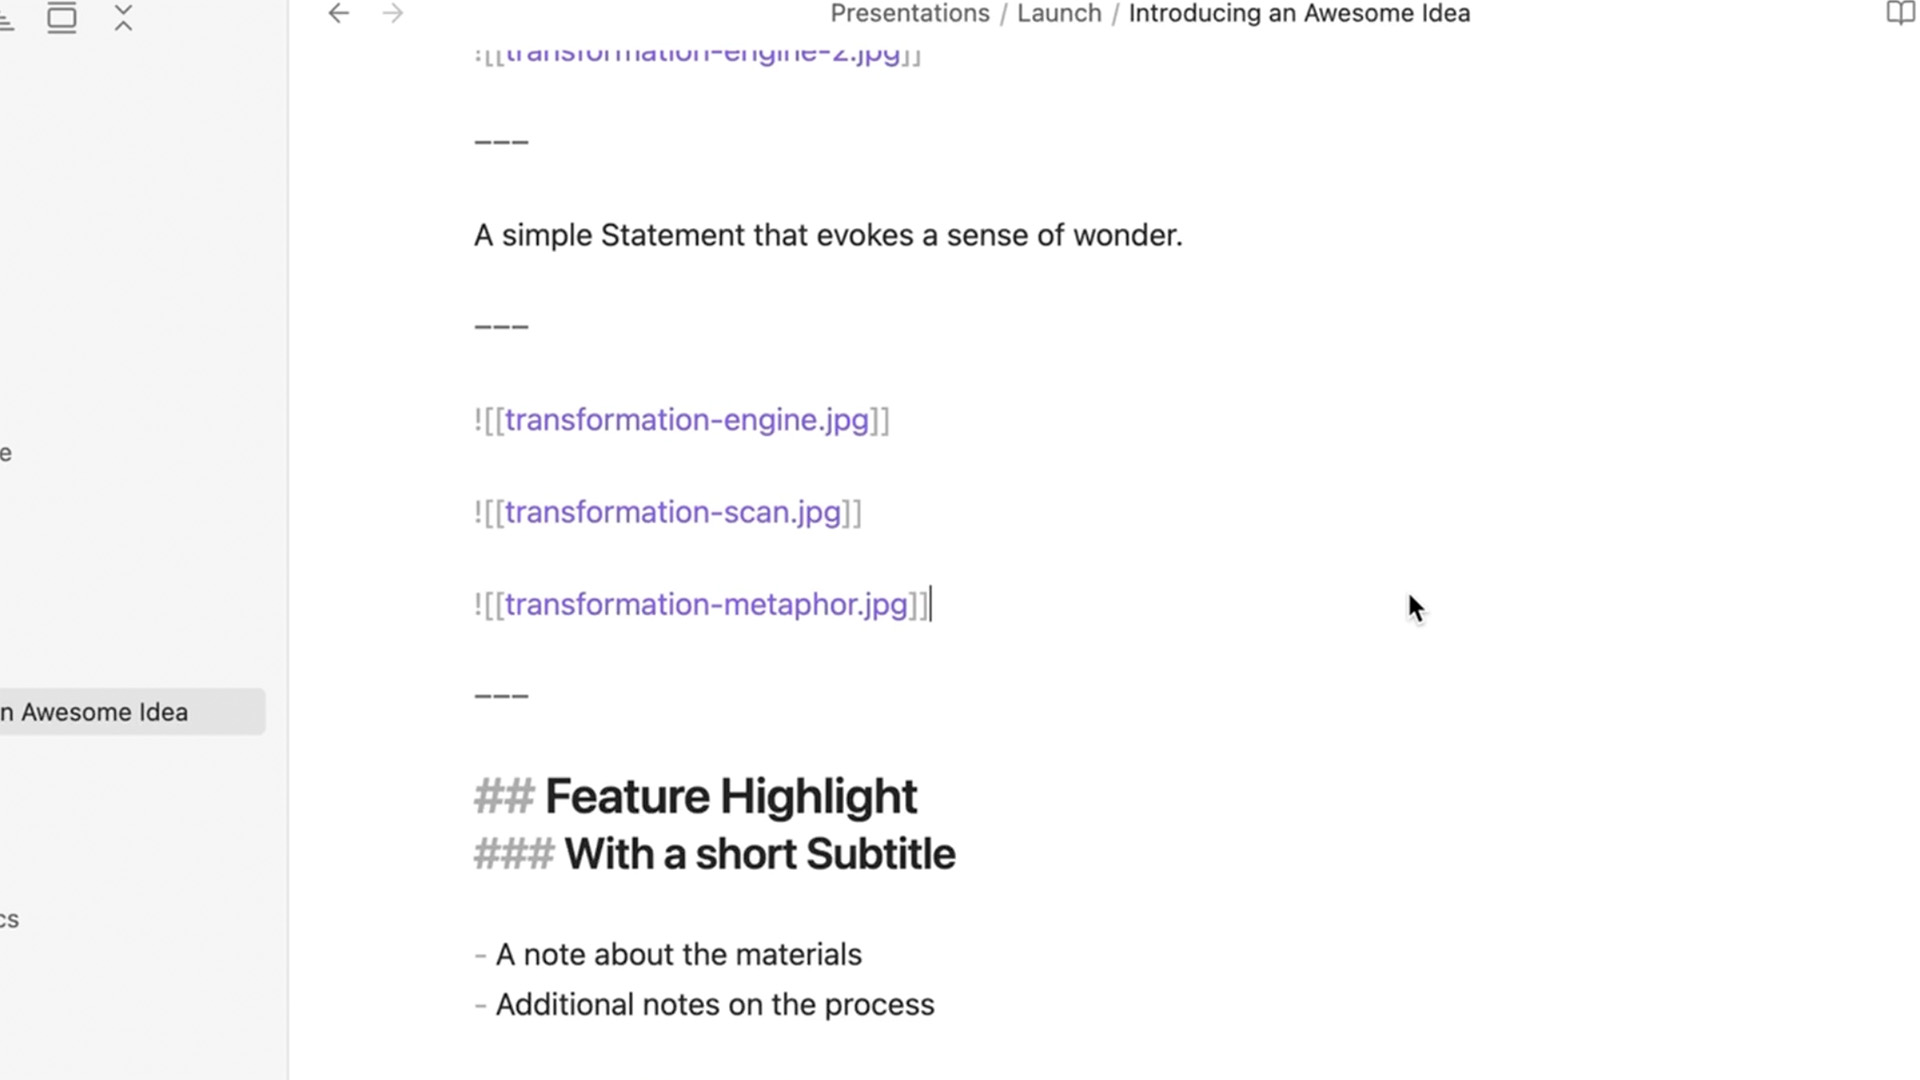
Speaking of three – let's also add a "Photo - 3 Up" layout here before we move into the Highlight slides.
Let's also add a bit of Emphasis to our Statement slide. You can Italicize text in Markdown by wrapping text with a single asterisk. Bolds use two asterisks, and Bold Italic is all 3 asterisks together.
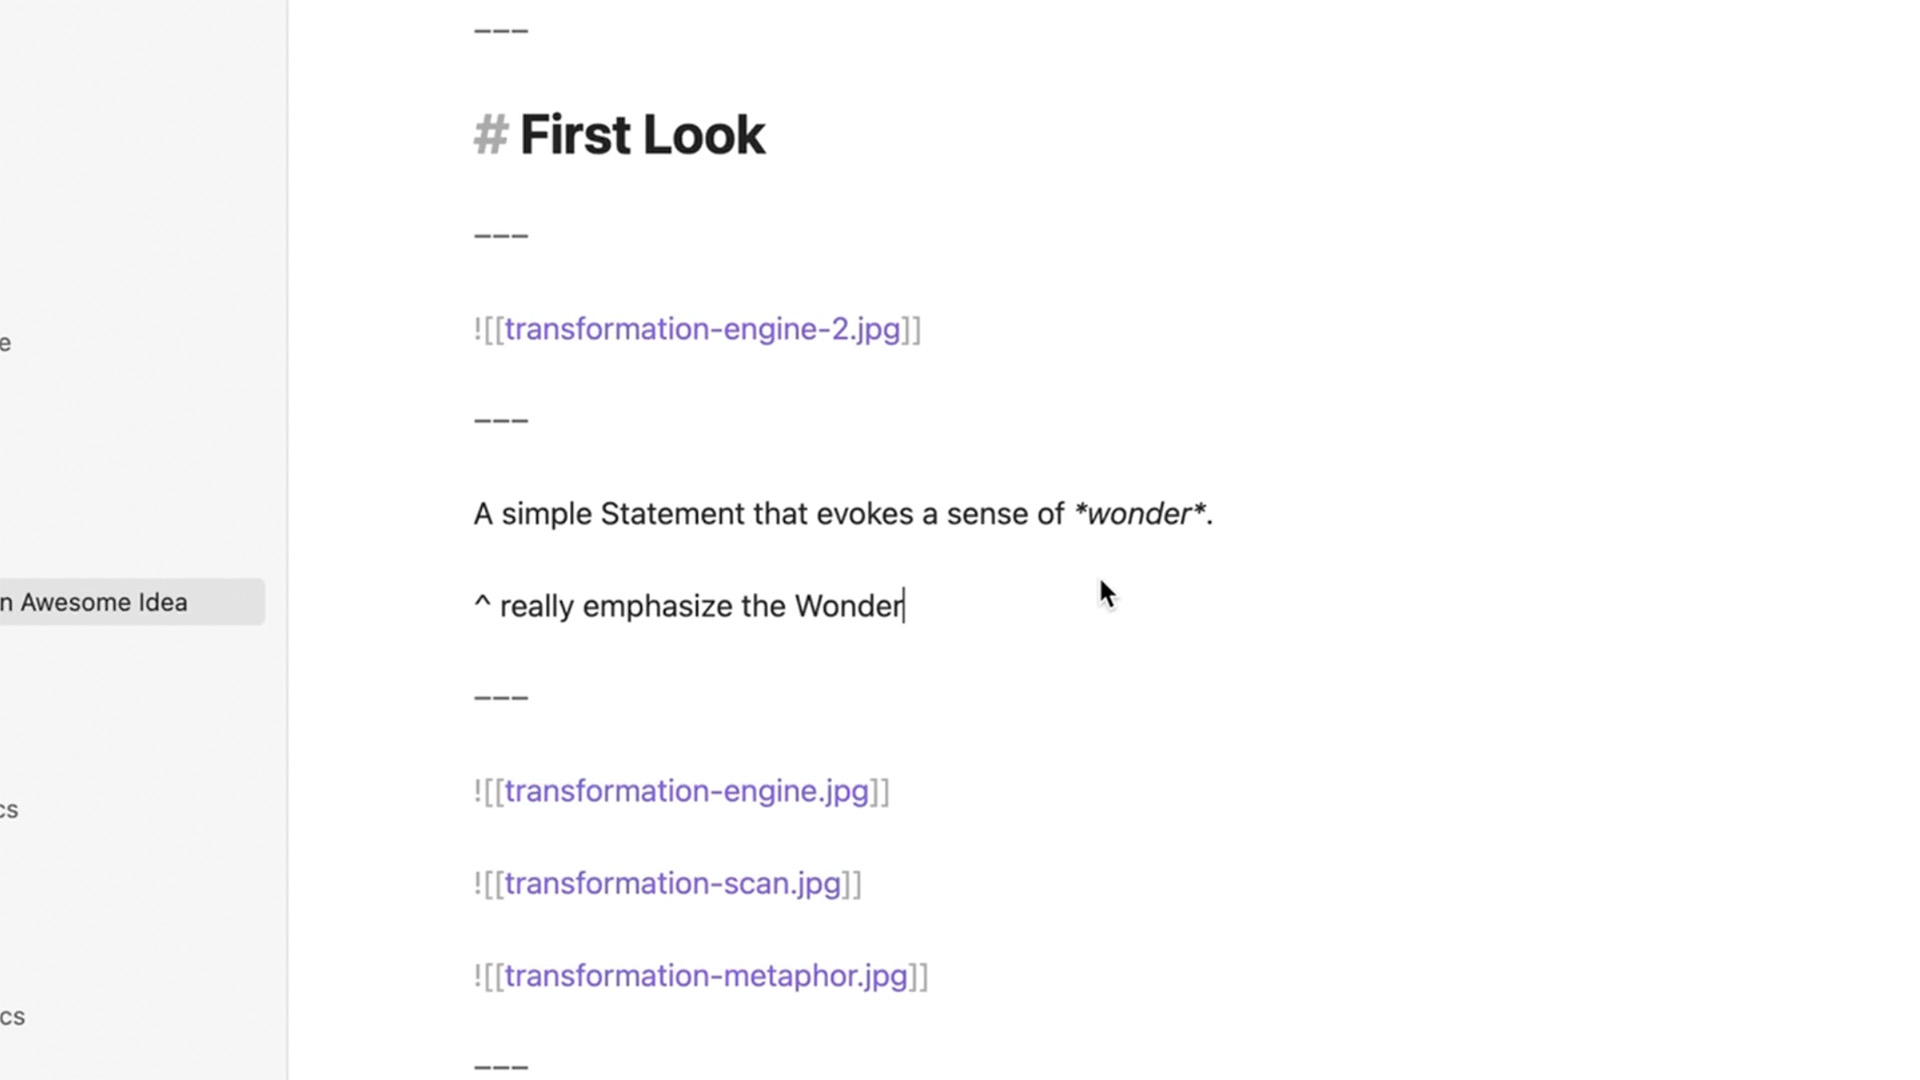
And we can add Presenter Notes right into the show's script as we go: add a new line starting with a Caret symbol and a space before your note whenever you'd like to include them on a slide.
Whenever you're ready to move back to Keynote, we just repeat the process from before: copy the updated script to the clipboard. Back in Composer, dismiss the old build by clicking the "Clear Output" button above the old response.
Delete the old markdown, and paste in the revised script. Then, re-compose with our changes.
Keynote side, we can discard the old build completely: the "Build a New Presentation" pathway generates entire shows from scratch, so we'll need to create a new starting point for the new build.
And just like before, we have a completely updated show built out in just a couple of moments.
That's all there is to a basic workflow on Composer's "New Presentation from Markdown" pathway. There's a lot more we can do to keep dialing in a more sophisticated show script: from advanced markdown for Tables and Data, to Composer-specific Tags that let you specify your layout or target specific placeholders. We'll dig into those in a bit more detail next time.
If you'd like to learn more in the meanwhile, you can find a complete, up-to-date reference on Composer-flavored Markdown on our Formatting Guide, which includes detailed notes on all of the currently-supported elements and tags, along with markdown Starter Slides to kick-start your show.