An Enhanced Tune-Up.
If you'd like to use a Custom Theme with the Composer Engine, there are a few updates you'll need to make in order to enable full Targeting Support and other advanced features.
In previous Customization tutorials, we've taken a look at re-defining Shape, Text, and other styles associated with a file's core Theme elements and generating a Custom Theme. If this is your first time delving into this sort of customization, our Make it Your Own tutorial provides a good bit of additional background information on the basics.
While we're going to be working in context of the same Custom Theme from those prior tutorials here, you don't need to working in the same file: all of the principles outlined here are universal with regards to how elements on the layouts should be tagged and layered to work with Composer's more advanced capabilities.
If you started your Custom Theme in one of our Composer-Enhanced Theme Systems, and built your custom theme from the Enhanced update, there's nothing you need to do: the changes below are already baked into your theme.
But if – as we're examing here – you built your Custom Theme file prior to those updates, or are working from a fully-custom source of your own, you'll need to be sure placeholders are tagged and layered in a similar fashion to enable you to use Targeting tags in your Composer scripts. Here, we're inheriting our Custom fork of an OM X theme from (well) before the Composer-Enhanced update.
First Principles
The root operating principle of Enhancing a Theme for Composer is that we're working around a few key limitations of using AppleScript and Keynote together: Keynote doesn't expose the root Tag or Display values of a placeholder to AppleScript, for one. So if you want to Target a specific item on a layout (beyond the default Title or Body elements), AppleScript needs to be able to identify some unique property to distinguish one object from another – otherwise the script's left guessing.
In our previous Custom Theme file, let's look at the default Title Card layout as an example:
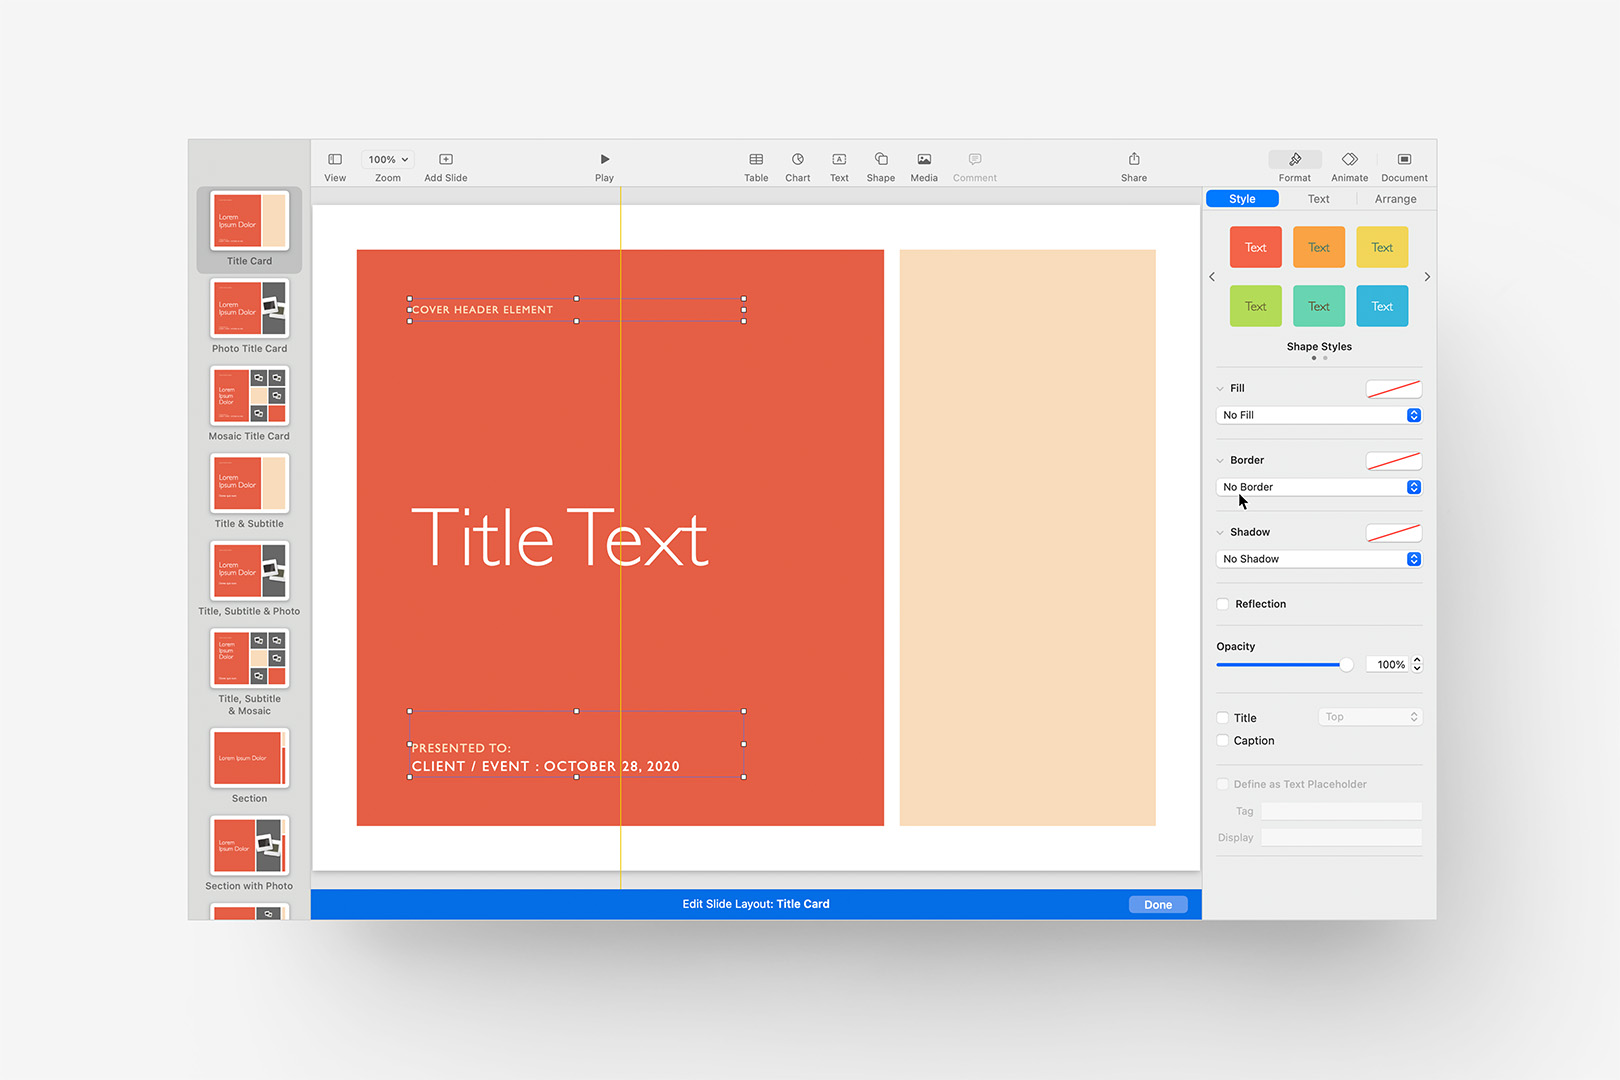
Examining the Title Card layout, we have two Placeholder obects to focus on.
Here, we have two Placeholder objects, in addition to the layout's default Title element. Both Placeholder elements contain some starter text, which will be pre-applied when the slide's inserted into your presentation. Setting the "Cover Header" placeholder's default text via the (since-added) Display property would give us an arguably better UX when the slide is added, as the field would remain empty if it wasn't needed. But since AppleScript can't read the Display property of the placeholder, it effectively renders the placeholder indistinguishable – functionally speaking – to AppleScript for the purposes of comparing the placeholders. (Setting aside that the Display tag can't describe the multi-style nature of the lower placeholder at all.)
In this case, both placeholders contain starter text in the objects themselves, so AppleScript will be able to examine the contents of the objects when this slide is added to our presentation: first hurdle cleared. And, in this case, the text inside each object is unique, so we can already use Target Placeholder and, in the case of the Provisional placeholder on the bottom, Subtarget Text tags, respectively (we use Subtarget Text on the lower placeholder to maintain the style differences – more on that below).
As the layout meets both criteria, it's effectively already optimized for Composer and can be described with the following Markdown:
# My Title

[target-placeholder: Cover Header Element]

My Cover Slide Header

[subtarget-text: Presented to:]

Prepared for:

[subtarget-text: Client / Event : October 28, 2020]

Client Name : August 5, 2025

[target-layout: Title Card]

---
We have our default H1 Title element, and we're using a "target-placeholder:" tag specifying the default text assigned to the "Cover Header Element" placeholder, as well as a "subtarget-text:" tag for each line of the multi-style Provisional. We're also including a "target-layout:" tag to be sure this is the layout assigned every time the script is parsed.
Composing that and running the build on a new (blank) instance of our Custom Theme produces the following output, as expected:
Running the Composer output from that Markdown against our Custom Theme behaves as expected.
If you're working in a fully-custom theme, and it doesn't include default placeholder text in the body of the placeholder elements themselves, you'll want to add some unique text to each placeholder you want to target so that AppleScript will be able to idenity the object via your default text: you're effectively "Declaring" the element in context of the layout.
Patterns and Layers
Let's move onto something a bit more complex that will allow us to examine a few more principles in context of each other: scroll down to the "Time Agenda" layout:
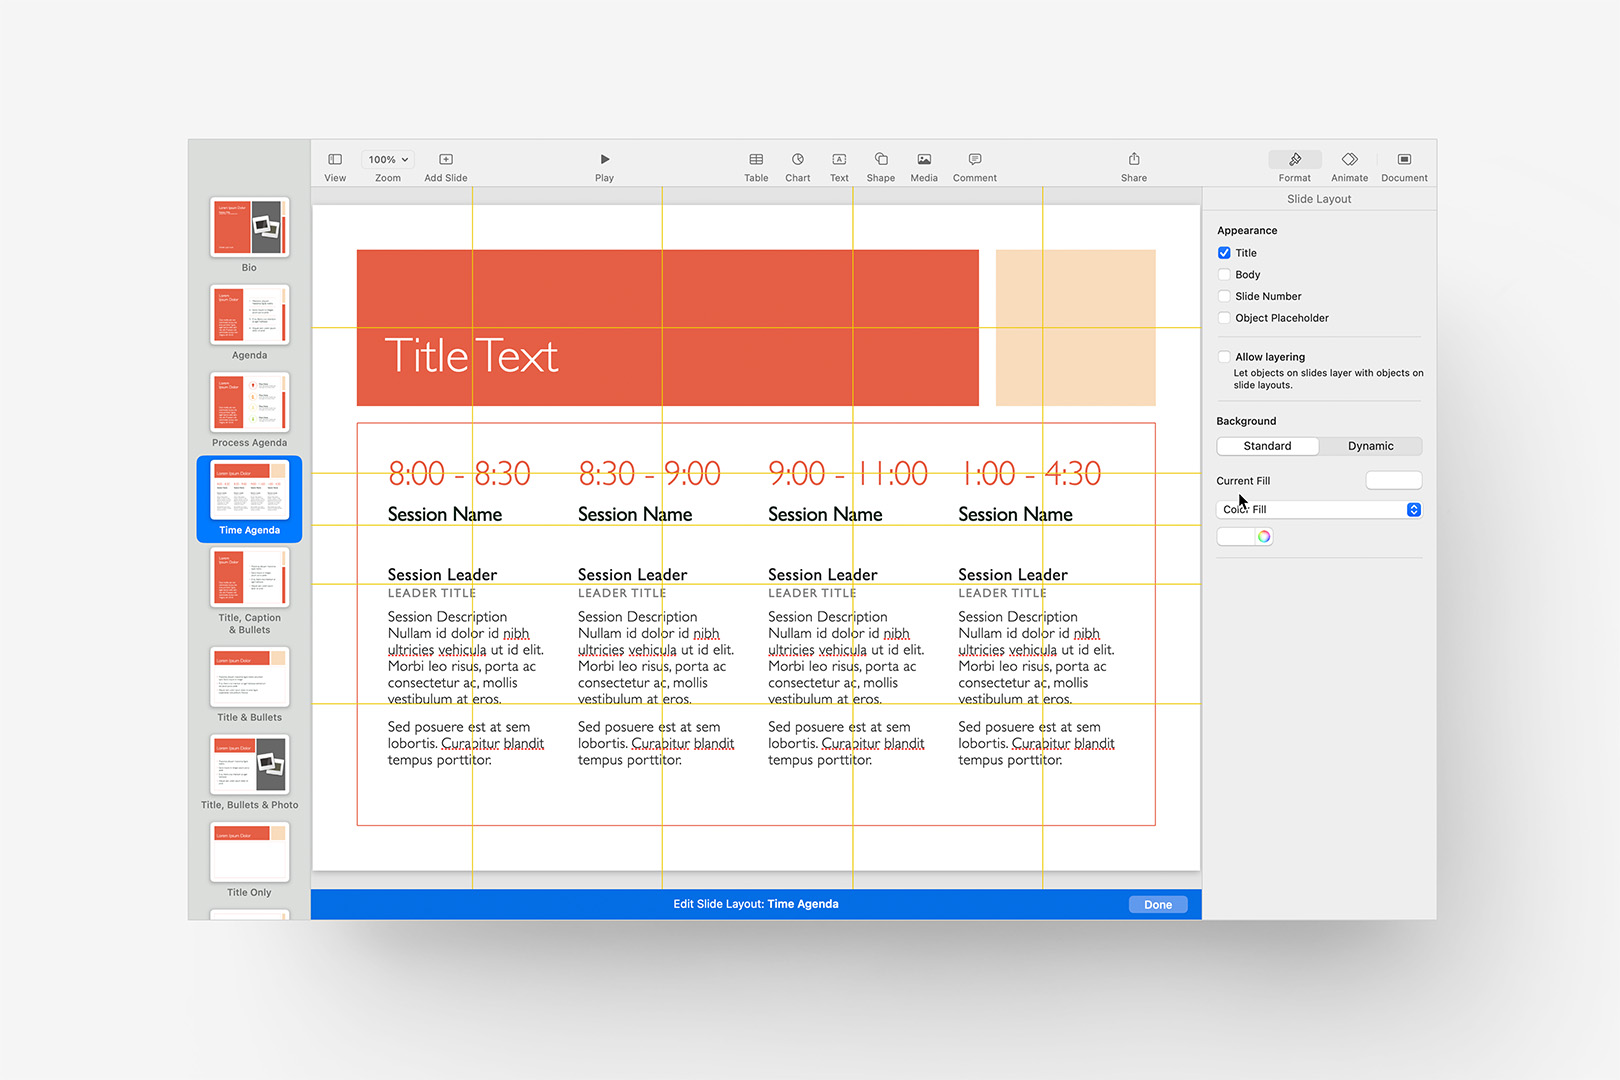
The Time Agenda layout includes 16 individual placeholders.
We have a default H2 Title, along with 16 individual placeholders – 4 columns of 4 rows each. Of those placeholders, only the top row contains unique placeholder text, so we'll have a bit of work to do here to get it optimized for targeting.
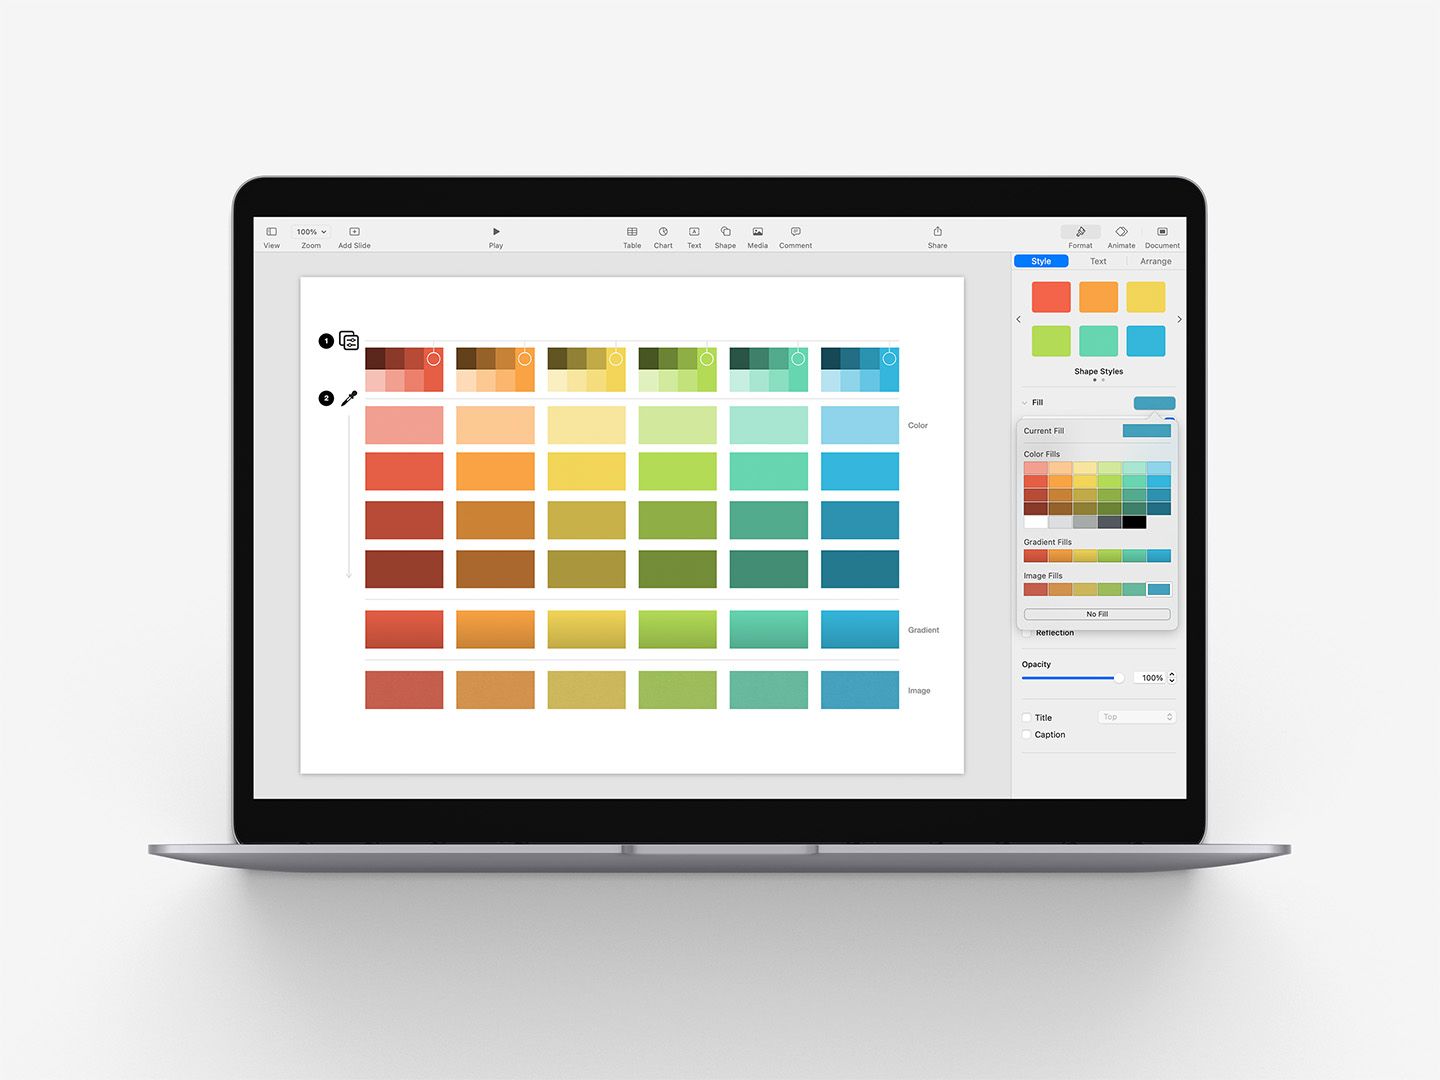
While you can use any approach to the nomenclature you'd prefer, we've found simple Name + Number patterns keep things easy to understand in both Keynote and Markdown. Here, we'll just add numbers to make them unique, and stick to basic Left > Right ordering. The "Session Description" placeholders become a bit cumbersome in this context, so we'll reduce those to keep things concise:
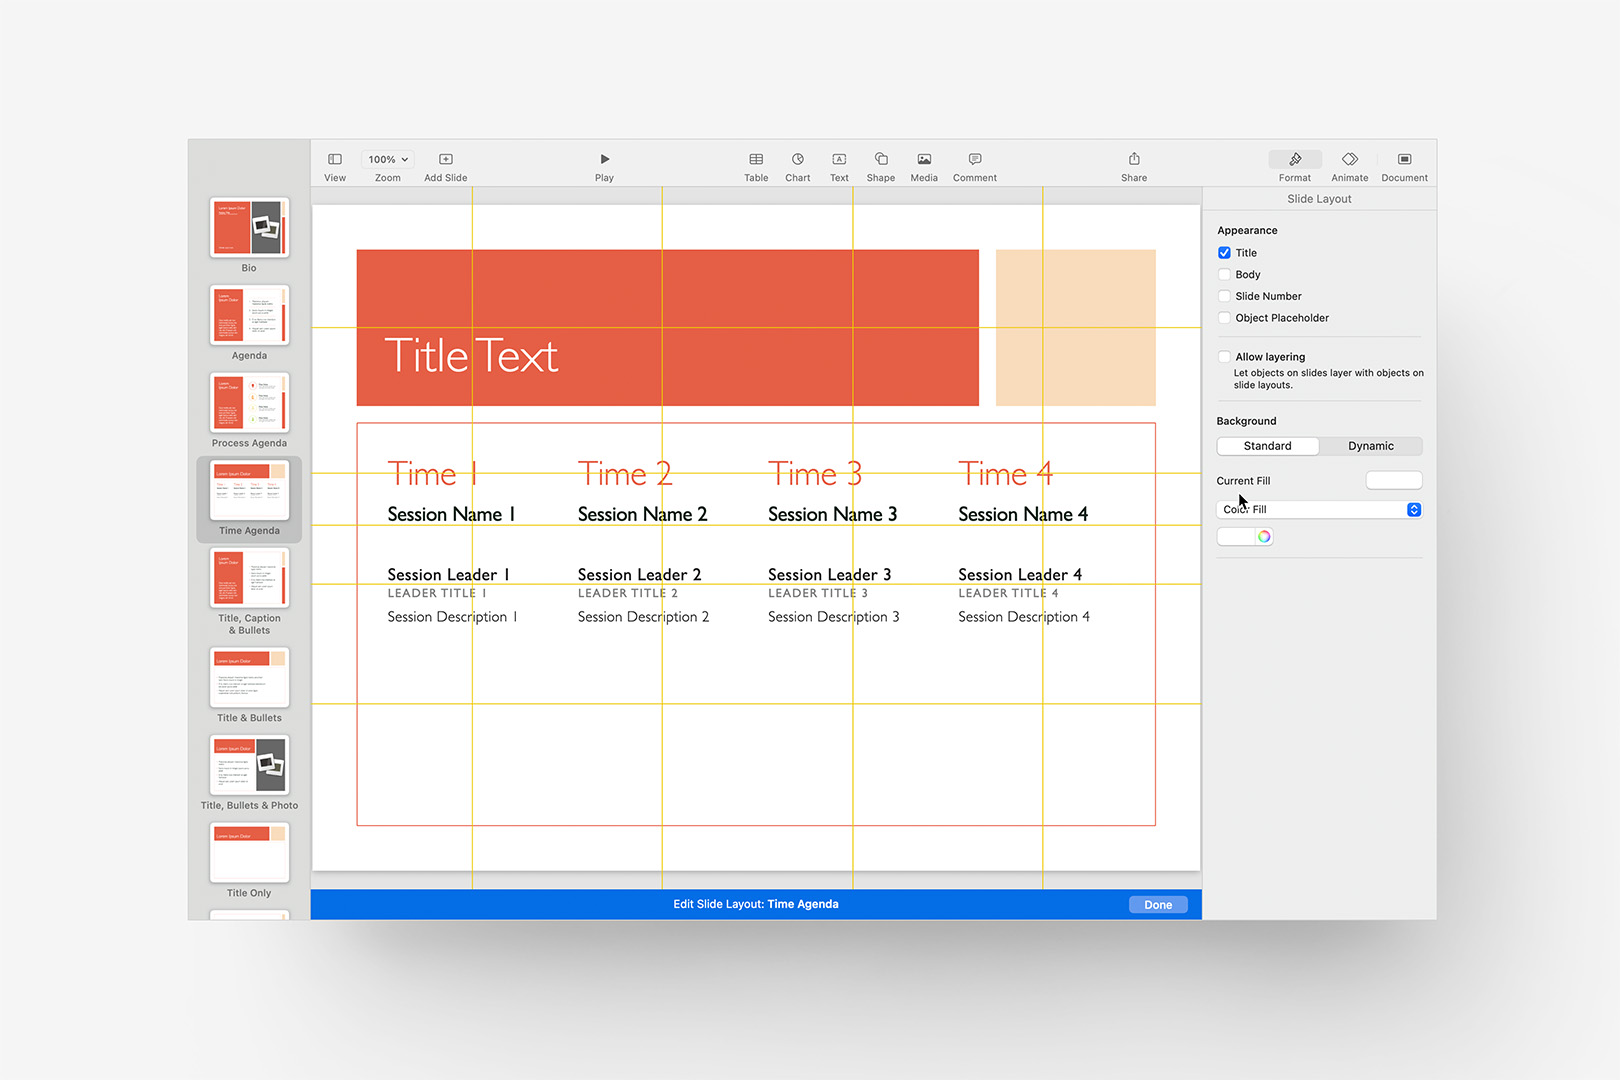
The revised Time Agenda layout, ready for Composer targeting.
If you're writing out your own Markdown references for your slides, that's straightforward to model out and duplicate, bearing in mind that we'd use Subtargeting on the "Session Leader" and "Leader Title" items here to maintain the style differences present within the single placeholder.
It can be easier, though, to let the machine do the work for us here: once we've saved out an updated version of the theme, we can run the Theme Target Manifest (TTM) script from Composer's Preflight tools to map out exactly how AppleScripts sees the targets and sub-targets available on each slide of your theme.
We have to be aware of an additional dimension to control the order of those placeholders in the TTM's Markdown output, though: their layering order. When AppleScript examines a Keynote slide by object type – in this case all text items on the slide – it returns them to us in Bottom-Up order: so the lower the item is in the layering order, the sooner it will appear to AppleScript.
So in context of our Time Agenda slide, to account for this we'll want to send each row to Back from bottom to top, then repeat that by column from right to left:
Re-order the objects by row, then by column to structure the layer-based hierarchy.
We can confirm that we're in correct Bottom-Up order by examing the slide in Slide mode with the Object List toggled to "Show" (in the View menu):
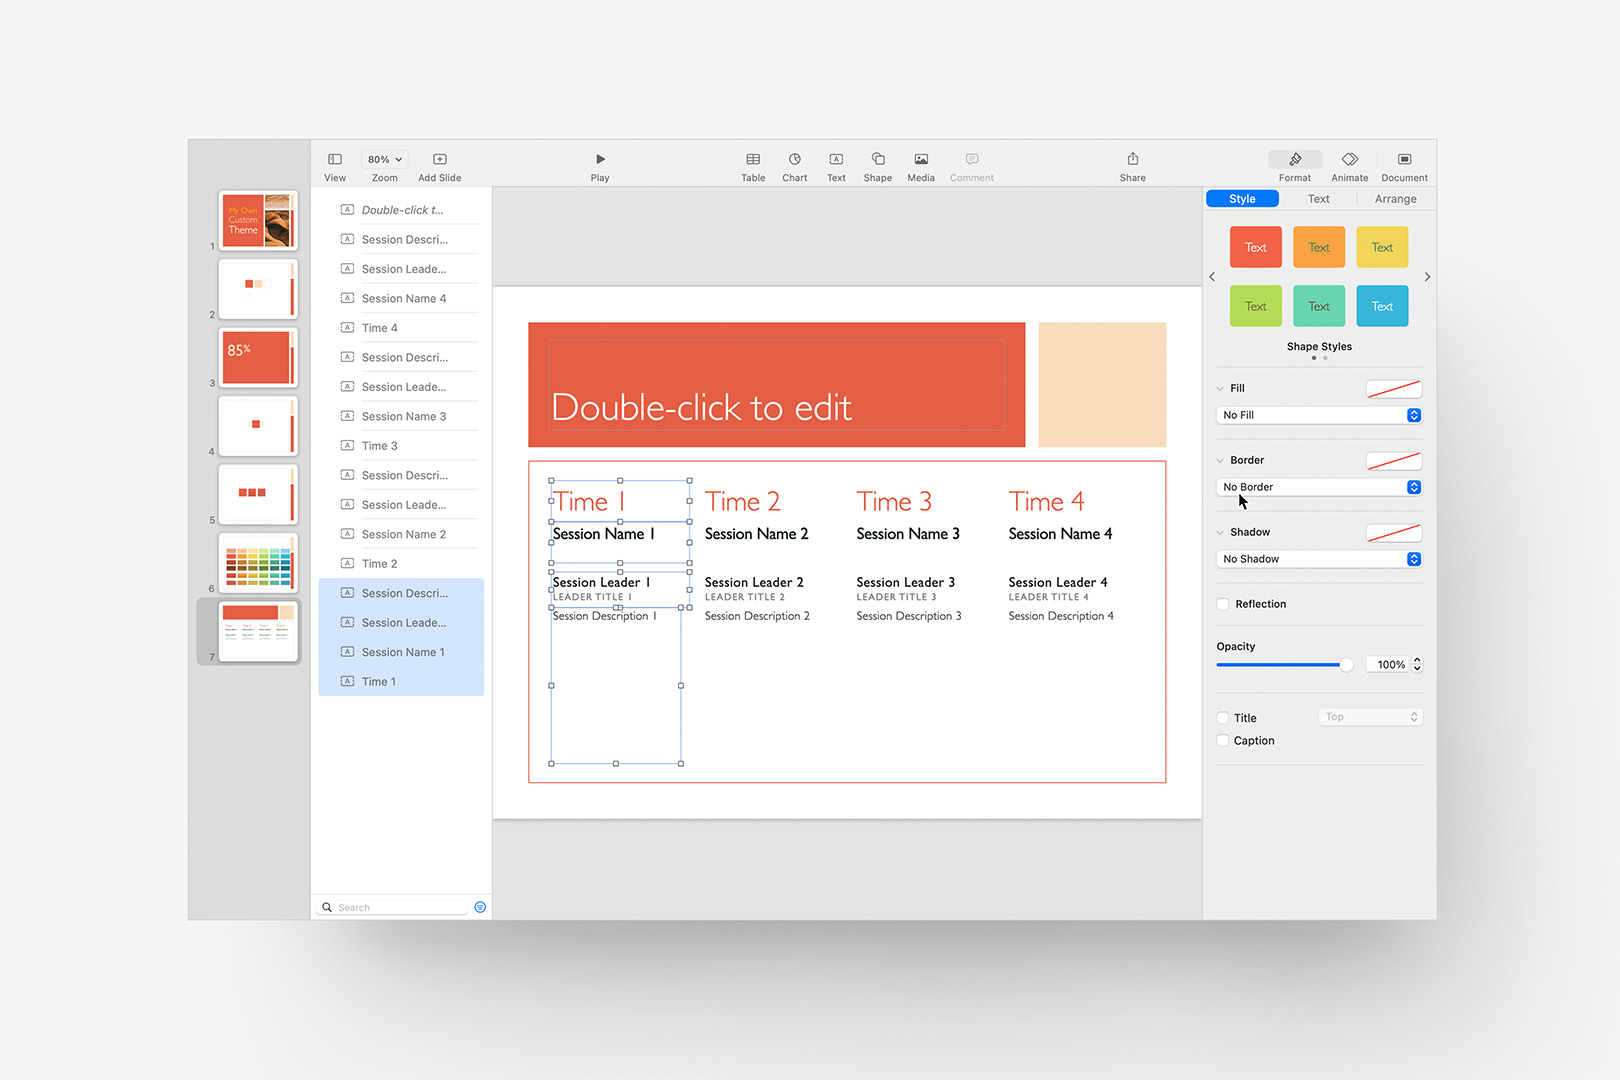
Use the Object List to confirm correct Bottom-Up ordering in Slide mode.
With that confirmed, once we export our updated theme and run the TTM, we'll get the following definition for the Time Agenda, ready to populate with replacement content:
## Title

[target-placeholder: Time 1]

[target-placeholder: Session Name 1]

[subtarget-text: Session Leader 1]

[subtarget-text: Leader Title 1]

[target-placeholder: Session Description 1]

[target-placeholder: Time 2]

[target-placeholder: Session Name 2]

[subtarget-text: Session Leader 2]

[subtarget-text: Leader Title 2]

[target-placeholder: Session Description 2]

[target-placeholder: Time 3]

[target-placeholder: Session Name 3]

[subtarget-text: Session Leader 3]

[subtarget-text: Leader Title 3]

[target-placeholder: Session Description 3]

[target-placeholder: Time 4]

[target-placeholder: Session Name 4]

[subtarget-text: Session Leader 4]

[subtarget-text: Leader Title 4]

[target-placeholder: Session Description 4]

[target-layout: Time Agenda]

---
Fine-Detail Quirks
Working through First Principles for declaring unique placeholder targets and being mindful of their layering/ordering will get you 95% of the way there: to Enhance the entire theme, we're simply applying these principles Layout-by-Layout through the entire file.
There are a few additional quirks to working in Keynote by way of AppleScript that we'll want to be aware of, though, to be sure we're fully dialed in. Let's jump back up to the "Speakers" slide:
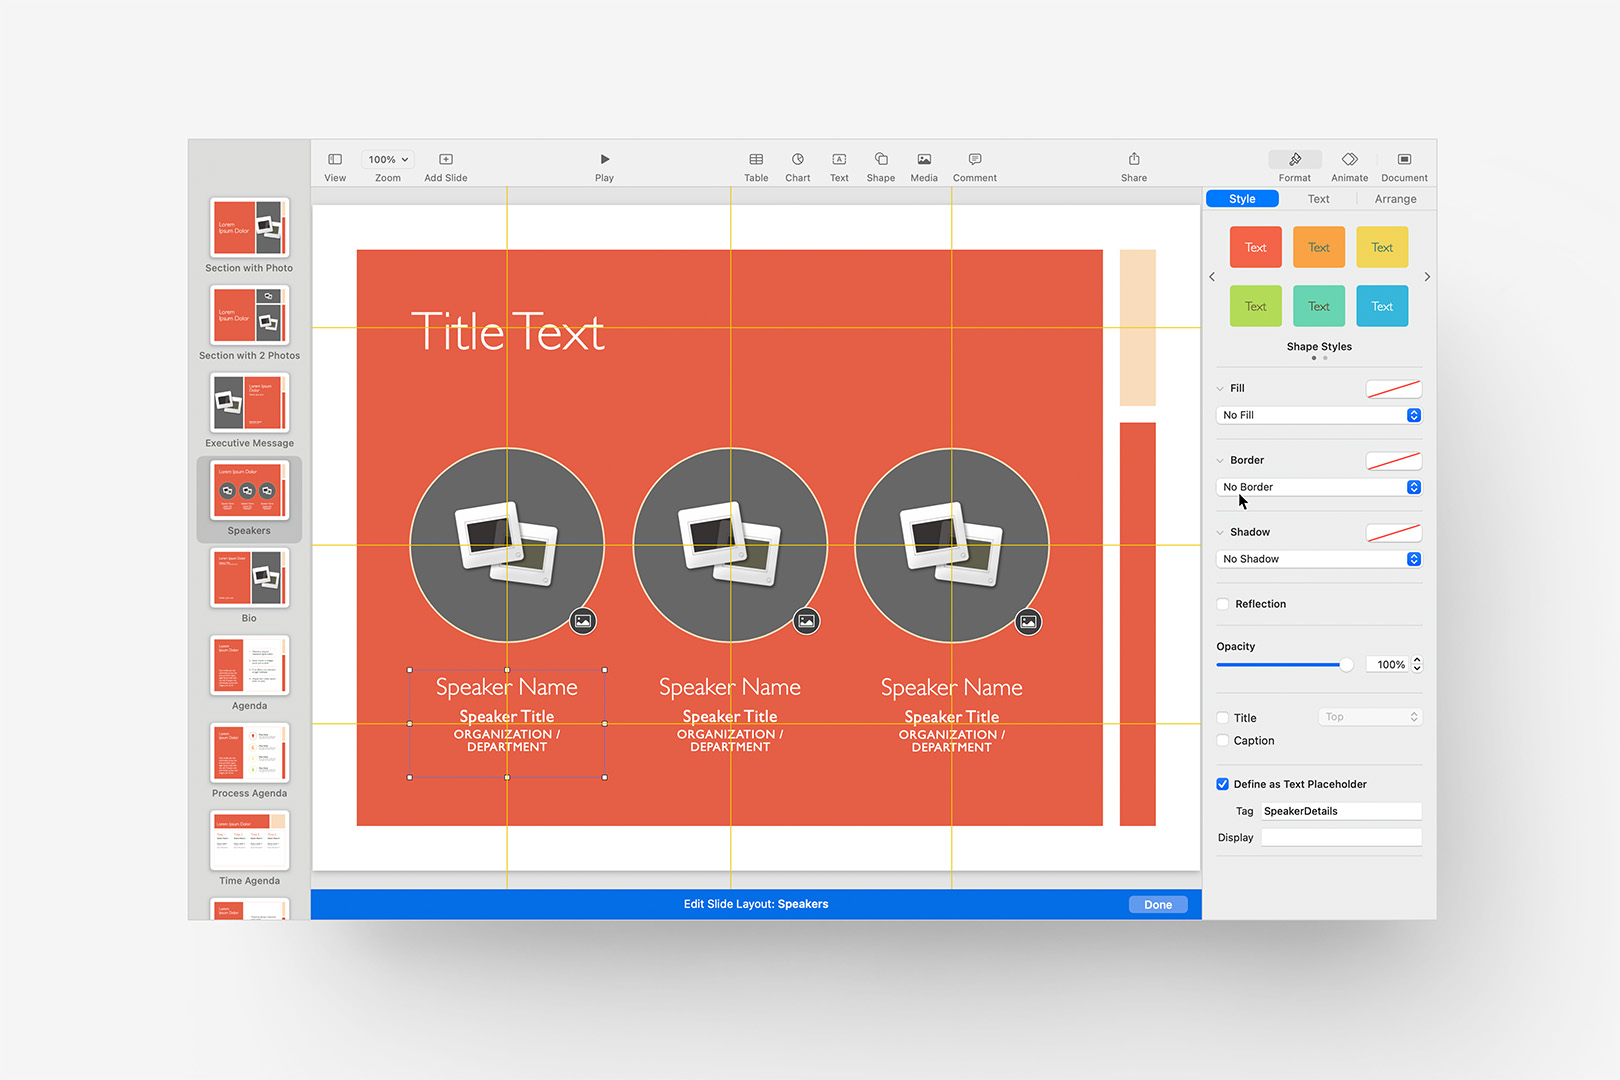
The Speakers layout includes 3 content columns, with associated photo placeholders.
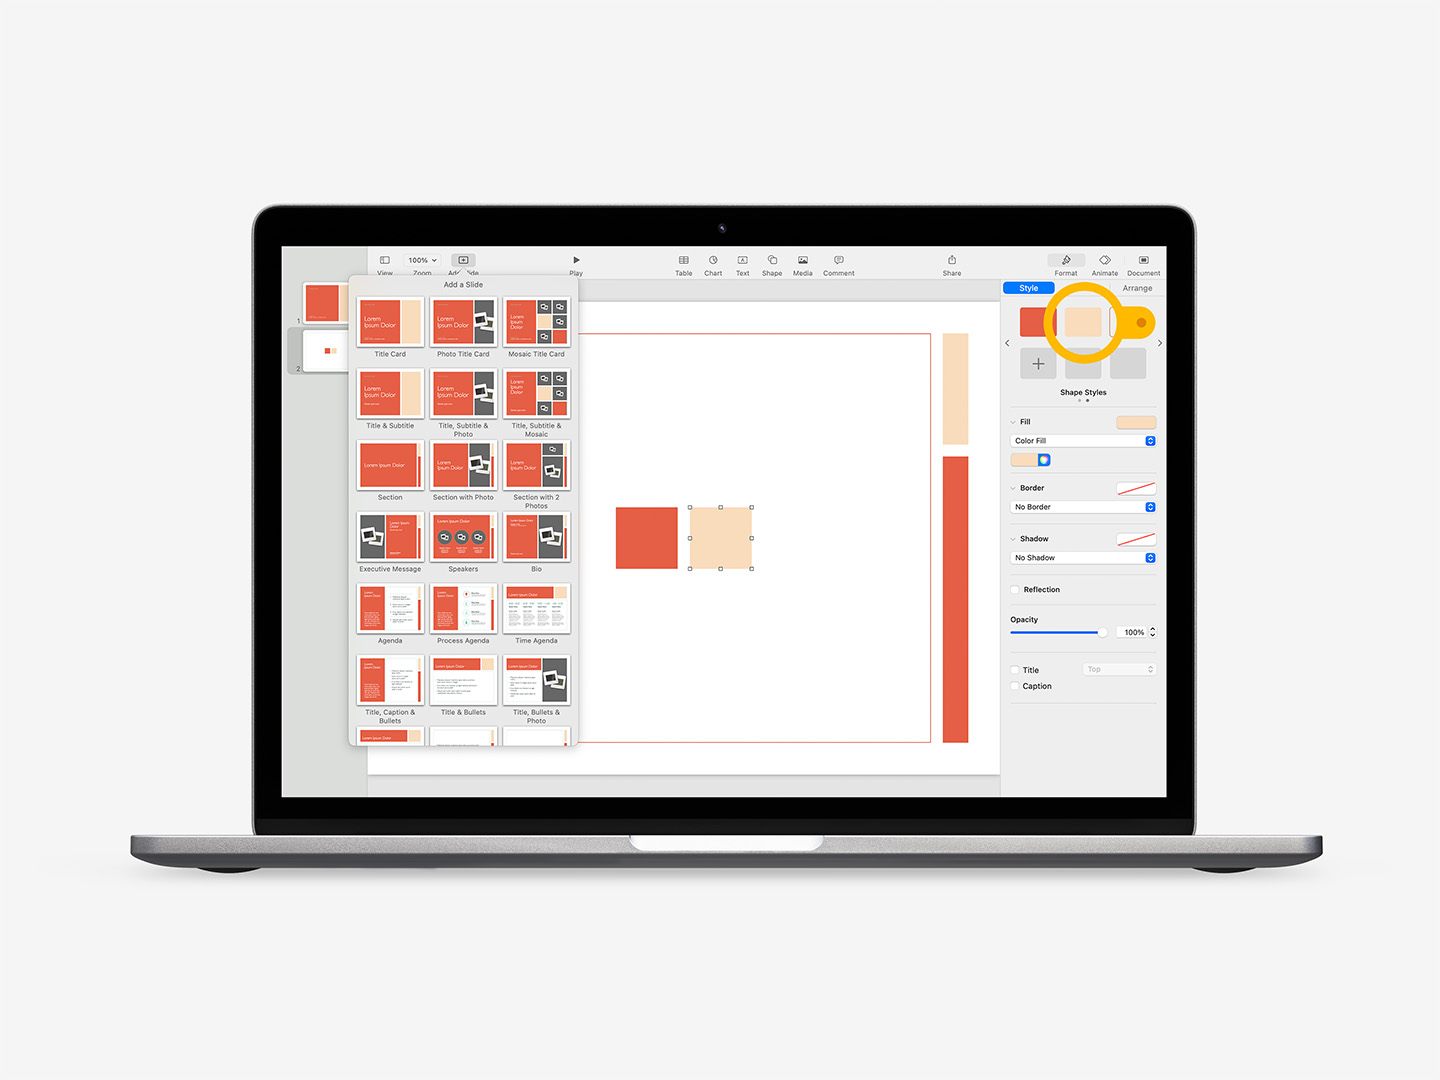
First things first: Image Placeholders should be layered into the Bottom-Up ordering exactly the same as text elements. There's no placeholder text to leverage here for identity purposes, so image placement on a multi-photo layout can only rely on layer order to target specific placeholders. So to keep them in Left-to-Right order like the columns here, we need to layer them accordingly, with the left-most placeholder being at the bottom of that stack.
Moving into the placeholder itself: we have 3 distinct paragraph styles in play in the base object, so we'll definitely map this out for Subtargeting. But we have an additional wrinkle here in the form of another quirk of working in Keynote by way of AppleScript: first-setting carryovers.
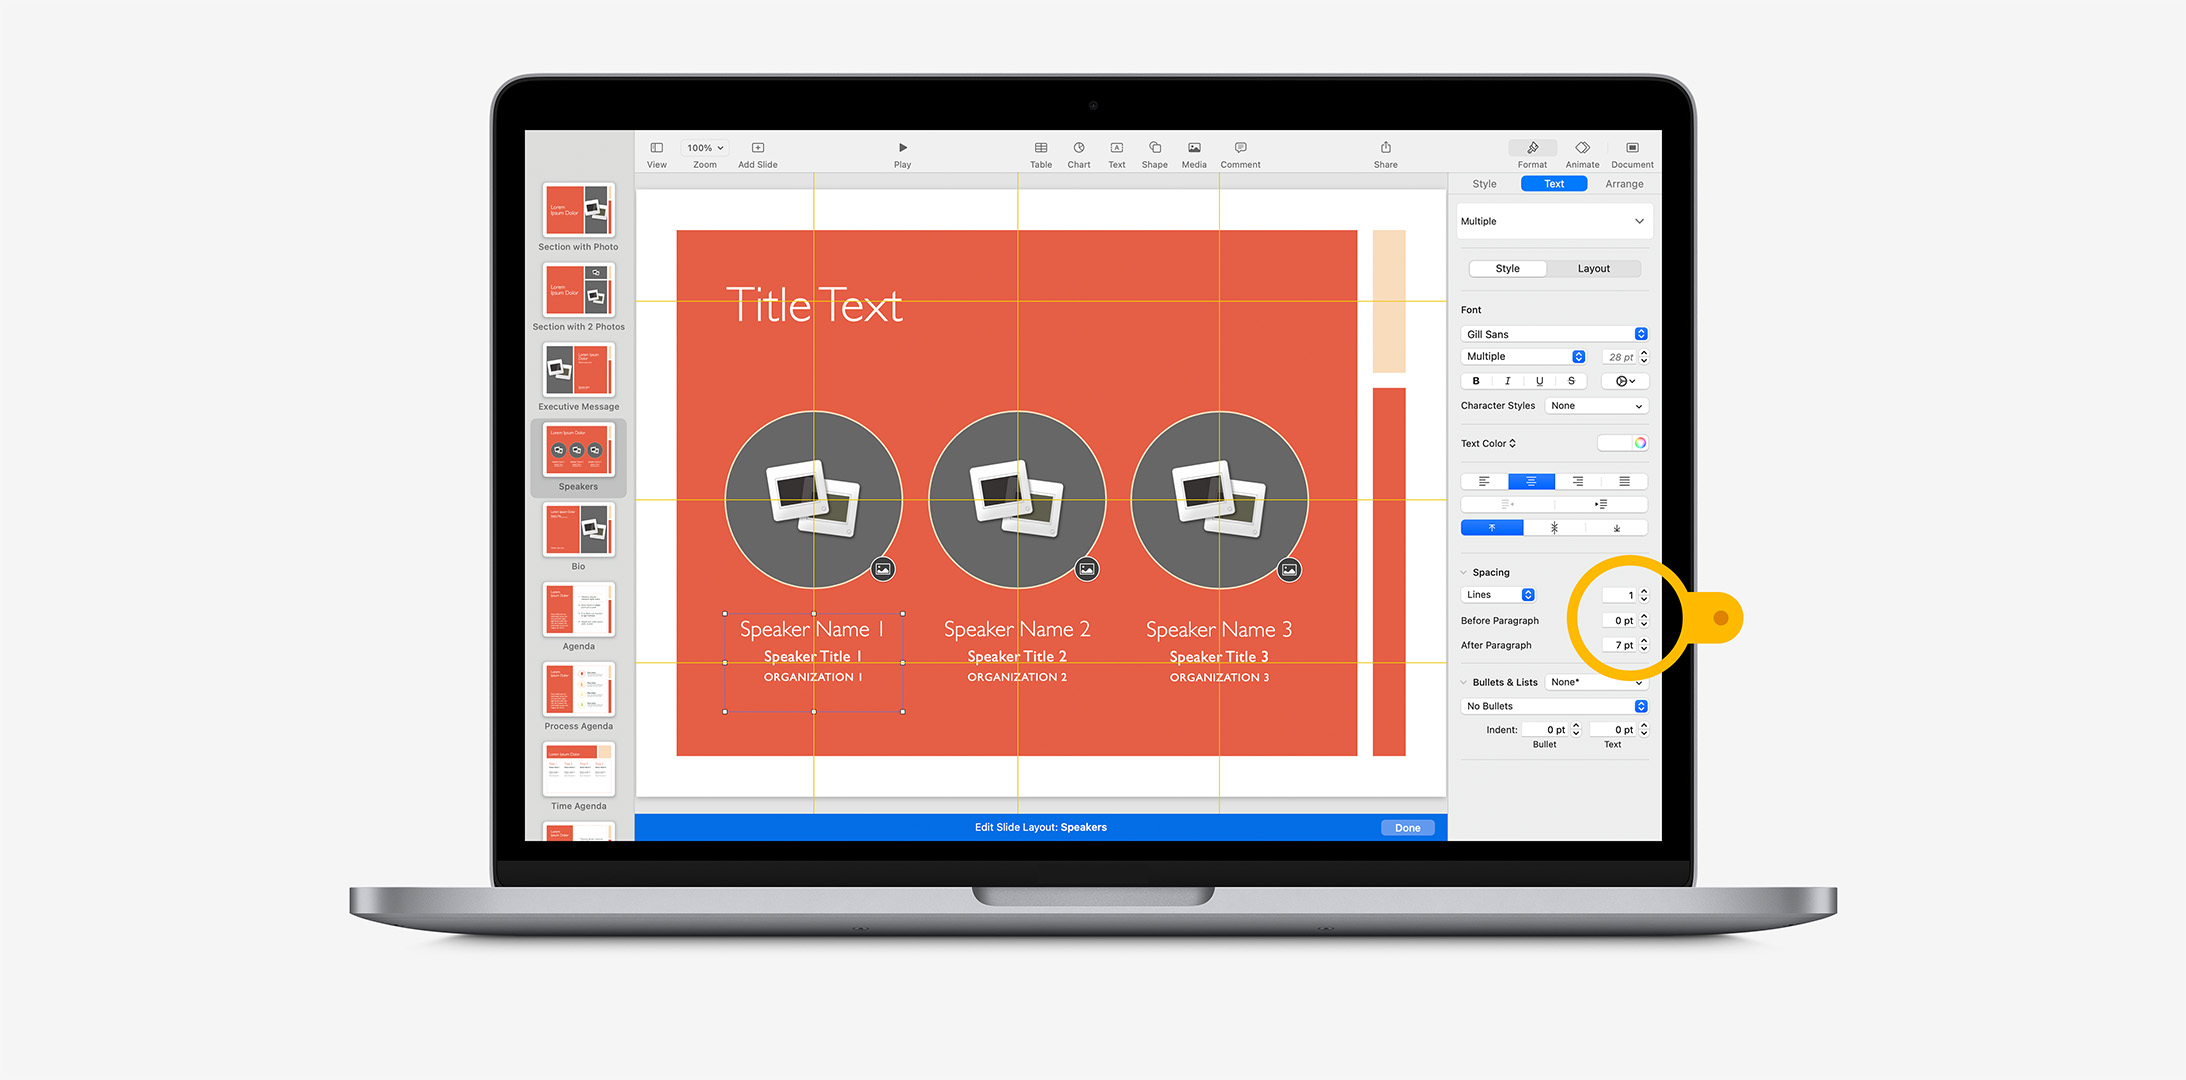
If we select the first paragraph in the placeholder, and inspect the settings applied to Spacing (highlighted here), we'll see the crux of the issue:
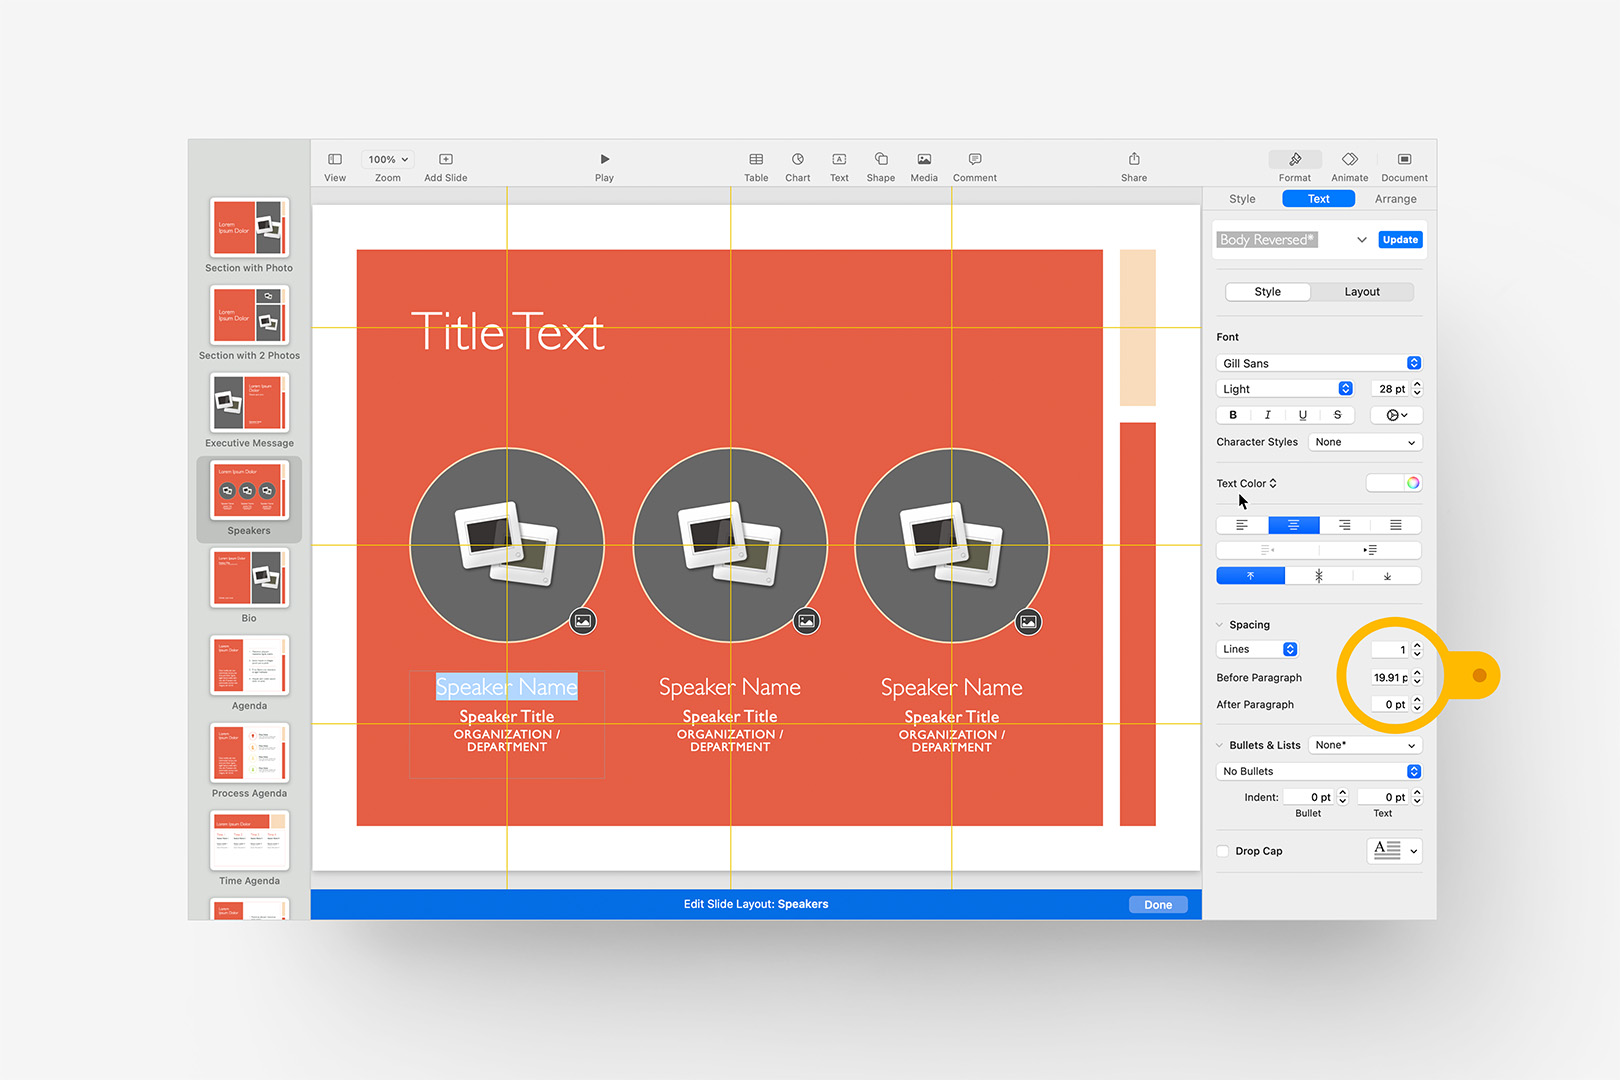
The first paragraph's Spacing, which will become the default during run-time.
Beyond the unnecessary Before Paragraph spacing carring over from the root style definition on that first paragraph, we can see that the Line spacing is set to "1", with no After Paragraph spacing. When we action the sub-targets in that object, that Line spacing of 1 will be applied to every following paragaph, regardless of subsequent paragraph settings – but so will that Before and After spacing, too.
So in practice, it's best to "flatten" the spacing of objects like these to the shared/uniform spacing that works best for all of the styles inside the object in context. Deselect any individual paragraph, and set those on the placeholder object itself to apply to all of the contained paragraphs uniformly. Generally speaking, given the Top-Down nature of the object, it's best to adjust that purely as a function of After Paragraph spacing here: we'd flip that around if the text were aligned to bottom.
Putting all of these pieces togther, we end up with adjustments to each column's subtargets to make them unique, adjusted layer ordering to be sure Left-to-Right ordering is correct, and a uniform Line Spacing of 1, with 7pt of After Paragraph spacing applied to all 3 placeholders, which is fairly comprable to the Name/Title spacing of the original:
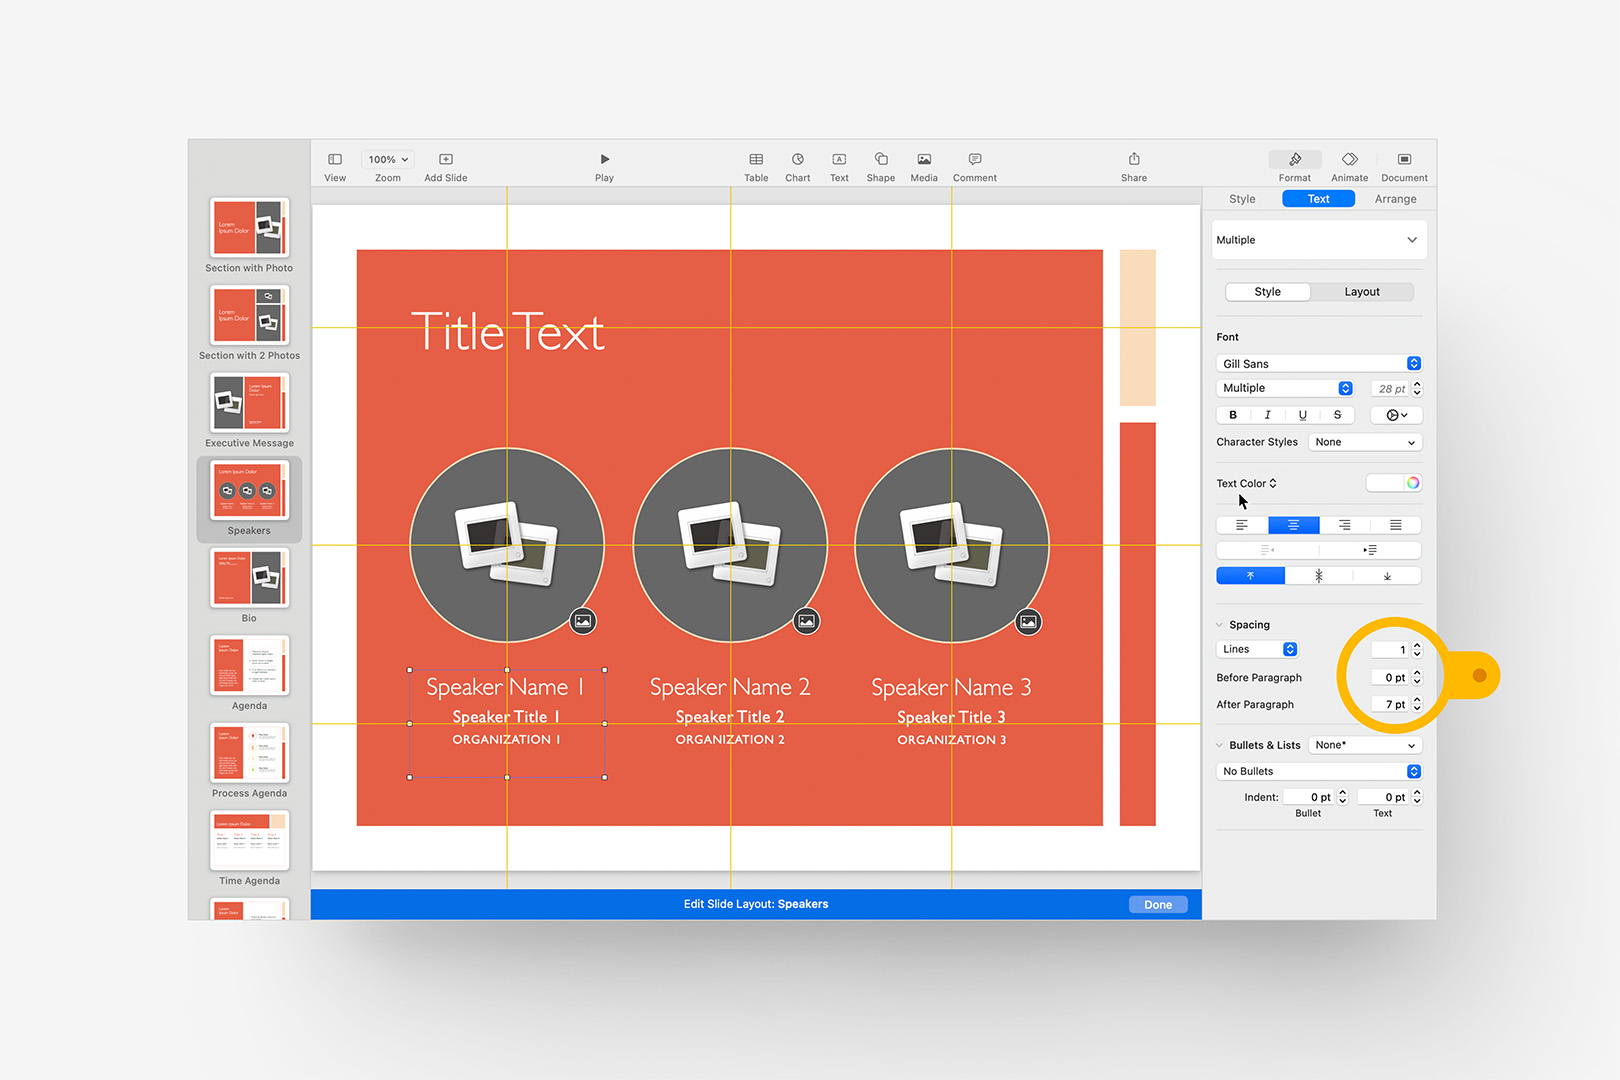
The fully revised Speakers slide, with uniform Spacing applied to the columns.
Export & Testing
Once you've applied these principles to each slide and you're ready to Export and Update your Custom Theme, we'll follow the same process outlined before in the Make it Your Own tutorial.
Before you install the updated theme in Keynote, though, it can be helpful to test it with the latest TTM script to be sure the output doesn't include anything surprising. Double-click your new theme file in Finder, and select "New Presentation" to start a new blank file, ignoring the old version in the Theme Chooser for now. Run the TTM, and examine the output for any repeating placeholder names, layer/ordering issues, or anything else unexpected.
You can likewise test the Build side of the equation prior to installation: select "New Presentation" again from the raw theme file in Finder. Script out your test show in Markdown, and select the Generic Theme Target option in Composer, which can be run against any open file:
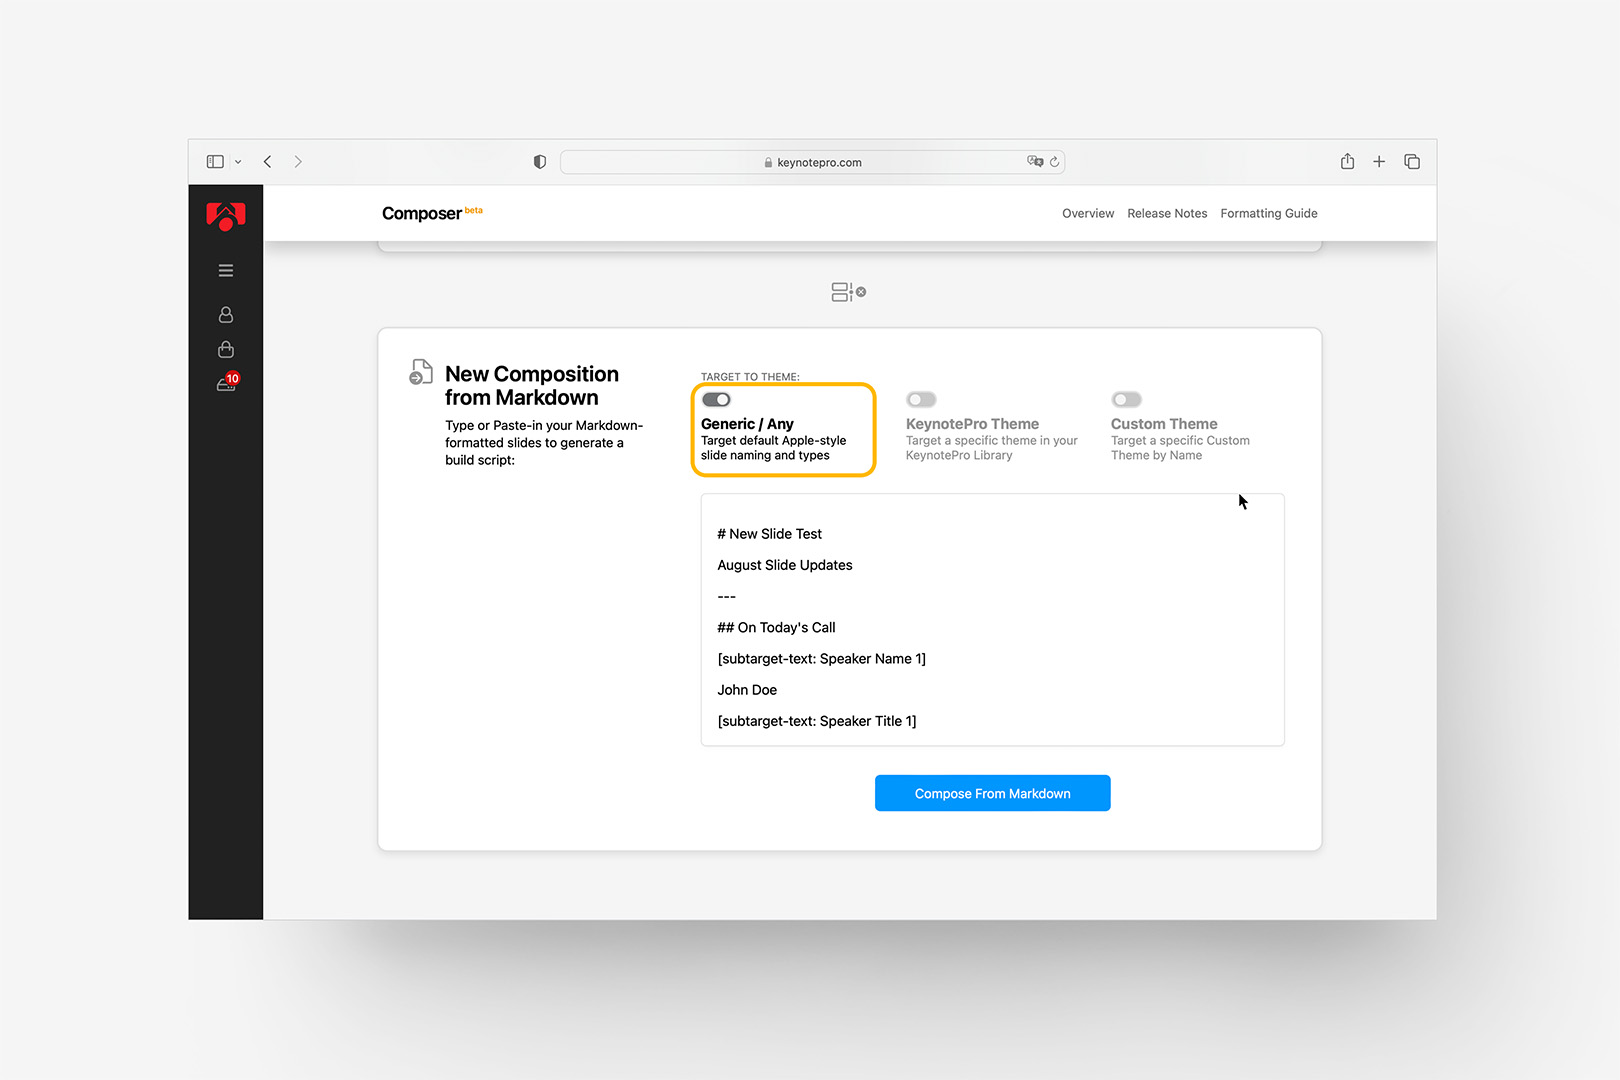
Pre-Install, we can test a theme with the Generic Theme Target.
This will build your test script in the active file in Keynote, so be sure your test theme is open and in the foreground before run time. Examine that each element matches your expected output: if you need to make tweaks, just re-export your theme and repeat.
When everything's locked in and you're ready to deploy, install your updated theme as usual. Once the Custom Theme is installed, and displaying in Keynote's Theme Chooser, you can initiate new files using the Custom Theme target:
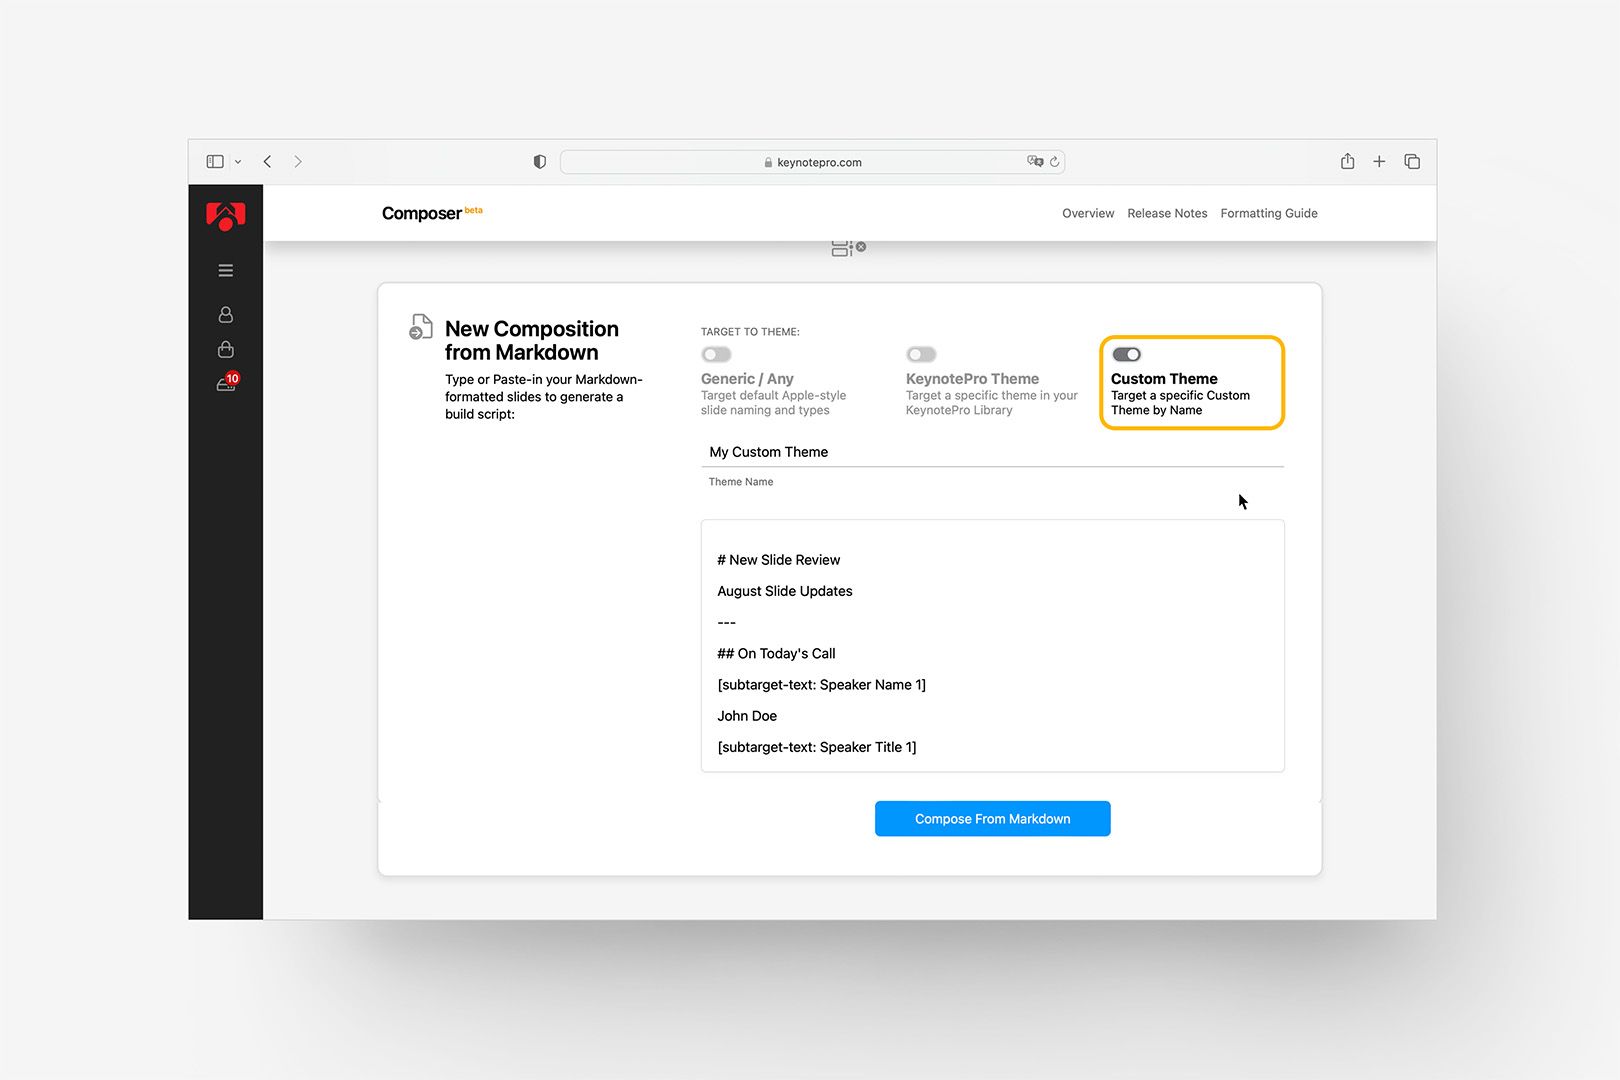
Once installed, target the theme with the Custom Theme option.
Be sure you enter your Custom Theme name exatly as it appears in the Theme Chooser. On the New Presentation pathways, this will create a new file using your Custom Theme and execute the Build Script without additional intervention.
Additional Resources